Nginx 介紹
Nginx 是俄羅斯人所編寫,是一款高效能的 HTTP 和反向代理服務器。也是 IMAP/POP3/SMTP 代理服務器。Nginx (發音是engine x)由俄羅斯的程式設計師 Igor Sysoev所開發的。可安裝在 UNIX、GNU/Linux、FreeBSD、Mac OS X、 Solaris 以及 Microsoft Windows等操作系統中。在 NETCRAFT 2012年8月 WEB Server 調查中,使用 Nginx 當服務器或是代理服務器就佔全世界的11.48%。隨著 Nginx 在很多大型網站的廣泛使用,其穩定、高效的特性逐漸被越來越多的使用者認可。
Nginx 和 Apache 相比較下有以下優勢 :
性能上 : Nginx 使用較少的系統資源,能支持更多的開發,已達到更高的效能。
功能上 : Nginx 是優良的代理服務器和負載平衡服務器。
安裝上 : Nginx 安裝簡單且配置靈活。
更多介紹可參考 :
安裝環境 :
首先有兩點要先說明一下
1. 由於以下版本安裝方式都是安裝當前最新版本,所以如果版本有更新的話。在安裝出來的結果有可能版本會和以下不同,而是該服務的最新版本。
2. 在此篇教學中所用到的所有套件,如果提供者載點死掉。都可在本站的載點自行下載使用
Centos 5.8
Nginx-1.2.5-1.el5.ngx
PHP 5.4.9
MySQL 5.5.28
安裝方式 :
使用第三方擴展源
以下有i386和x86_64兩種,請選適合的使用。
i386
|
1 |
[root@localhost ~]# rpm -Uvh http://dl.fedoraproject.org/pub/epel/5/i386/epel-release-5-4.noarch.rpm |
x86_64
|
1 |
[root@localhost ~]# rpm -Uvh http://dl.fedoraproject.org/pub/epel/5/x86_64/epel-release-5-4.noarch.rpm |
認證擴展源
需使用此認證才會抓取到第三方擴展源
|
1 |
[root@localhost ~]# rpm -Uvh http://rpms.famillecollet.com/enterprise/remi-release-5.rpm |
安裝和更新常用套件
更新已有的套件
先把已安裝的套件更新一下。若不想更新已有的套件的話就略過
|
1 |
[root@localhost ~]# yum -y update |
安裝常用套件
|
1 2 |
[root@localhost ~]# LANG=C [root@localhost ~]# yum -y install gcc gcc-c++ autoconf libjpeg libjpeg-devel libpng libpng-devel freetype freetype-devel libxml2 libxml2-devel zlib zlib-devel glibc glibc-devel glib2 glib2-devel bzip2 bzip2-devel ncurses ncurses-devel curl curl-devel e2fsprogs e2fsprogs-devel krb5 krb5-devel libidn libidn-devel openssl openssl-devel openldap openldap-devel nss_ldap openldap-clients openldap-servers patch zip |
安裝 MySQL
查看要安裝的版本
|
1 2 3 4 5 6 7 8 9 10 11 12 13 14 15 16 17 18 |
[root@localhost ~]# yum --enablerepo=remi,remi-test list mysql mysql-server mysql-devel Loaded plugins: fastestmirror, security Loading mirror speeds from cached hostfile * base: ftp.tc.edu.tw * epel: ftp.riken.jp * extras: ftp.tc.edu.tw * remi: remi-mirror.dedipower.com * remi-test: remi-mirror.dedipower.com * updates: ftp.tc.edu.tw Installed Packages mysql.x86_64 5.0.95-1.el5_7.1 installed Available Packages mysql.i386 5.0.95-1.el5_7.1 updates mysql.x86_64 5.5.28-1.el5.remi remi mysql-devel.i386 5.0.95-1.el5_7.1 updates mysql-devel.x86_64 5.5.28-1.el5.remi remi mysql-server.x86_64 5.5.28-1.el5.remi remi |
安裝或升級 MySQL
|
1 |
[root@localhost ~]# yum --enablerepo=remi,remi-test install mysql mysql-server mysql-devel dovecot |
查看安裝後的版本
|
1 2 3 4 5 6 7 8 |
[root@localhost ~]# rpm -qa | grep mysql mysql-server-5.5.28-1.el5.remi mysqlclient15-5.0.67-1.el5.remi mysql-5.0.95-1.el5_7.1 mysql-5.5.28-1.el5.remi mysql-devel-5.0.95-1.el5_7.1 mysql-devel-5.5.28-1.el5.remi mysql-libs-5.5.28-1.el5.remi |
安装cmake
|
1 2 3 4 5 6 |
[root@localhost ~]# cd /opt [root@localhost ~]# wget http://www.cmake.org/files/v2.8/cmake-2.8.10.tar.gz [root@localhost ~]# tar -zxvpf cmake-2.8.10.tar.gz [root@localhost ~]# cd cmake-2.8.10 [root@localhost ~]# ./bootstrap --prefix=/usr/local/cmake [root@localhost ~]# gmake && gmake install |
修改 centos環境變數
|
1 2 3 4 5 6 |
[root@localhost ~]# vim /etc/profile 找到export PATH USER LOGNAME MAIL HOSTNAME HISTSIZE INPUTRC 下一行加入 export PATH=/usr/local/cmake/bin:$PATH 儲存後重啟系統 |
安裝 PHP
修改yum 配置
把 remi.repo 內的 enabled=0 改為enabled=1
|
1 2 3 4 5 6 7 8 9 10 11 12 13 14 15 16 17 |
[root@localhost ~]# vim /etc/yum.repos.d/remi.repo [remi] name=Les RPM de remi pour Enterprise Linux $releasever - $basearch #baseurl=http://rpms.famillecollet.com/enterprise/$releasever/remi/$basearch/ mirrorlist=http://rpms.famillecollet.com/enterprise/$releasever/remi/mirror enabled=1 gpgcheck=1 gpgkey=file:///etc/pki/rpm-gpg/RPM-GPG-KEY-remi failovermethod=priority [remi-test] name=Les RPM de remi en test pour Enterprise Linux $releasever - $basearch #baseurl=http://rpms.famillecollet.com/enterprise/$releasever/test/$basearch/ mirrorlist=http://rpms.famillecollet.com/enterprise/$releasever/test/mirror enabled=1 gpgcheck=1 gpgkey=file:///etc/pki/rpm-gpg/RPM-GPG-KEY-remi |
安裝或升級 PHP
在 PHP 的部份可分為兩種版本「目前最新版本PHP 5.4.9」和「PHP 5.3.18」。請依各自需求設定。
PHP 5.4.9
|
1 |
[root@localhost ~]# yum -y install php php-fpm php-cli php-pdo php-mysql php-mcrypt php-mbstring php-gd php-tidy php-xml php-xmlrpc php-pear php-pecl-memcache php-eaccelerator php-bcmath php-sqlite php-xnmp php-ldap php-devel |
PHP 5.3.18
|
1 |
[root@localhost ~]# yum -y install php php-fpm php-cli php-pdo php-mysql php-mcrypt php-mbstring php-gd php-tidy php-xml php-xmlrpc php-pear php-pecl-memcache php-eaccelerator php-bcmath php-sqlite php-xnmp php-ldap php-devel --disablerepo=remi-test |
安装PHP 相關模組
Yum 安裝
若不想用編譯安裝的話可使用yum。不過使用yum安裝的話還是會有(libiconv、ImageMagick和imagick)這三個模組沒安裝到需要手動編譯安裝
|
1 |
[root@localhost ~]# yum install libmcrypt libmcrypt-devel php-mcrypt php-eaccelerator php-pecl-memcache mhash php-pdo |
編譯安裝
安裝編譯 PHP 的相關模組
libiconv-1.14
|
1 2 3 4 5 6 |
[root@localhost ~]# cd /opt [root@localhost ~]# wget http://ftp.gnu.org/pub/gnu/libiconv/libiconv-1.14.tar.gz [root@localhost ~]# tar -zxvpf libiconv-1.14.tar.gz [root@localhost ~]# cd libiconv-1.14 [root@localhost ~]# ./configure --prefix=/usr/local [root@localhost ~]# make && make install |
libmcrypt-2.5.8
|
1 2 3 4 5 6 7 8 9 10 |
[root@localhost ~]# cd /opt [root@localhost ~]# wget ftp://ftp.eenet.ee/pub/FreeBSD/distfiles/libmcrypt-2.5.8.tar.gz [root@localhost ~]# tar -zxvpf libmcrypt-2.5.8.tar.gz [root@localhost ~]# cd libmcrypt-2.5.8 [root@localhost ~]# ./configure --prefix=/usr/local [root@localhost ~]# make && make install [root@localhost ~]# /sbin/ldconfig [root@localhost ~]# cd libltdl/ [root@localhost ~]# ./configure --enable-ltdl-install [root@localhost ~]# make && make install |
mhash-0.9.9.9
|
1 2 3 4 5 6 |
[root@localhost ~]# cd /opt [root@localhost ~]# wget http://sourceforge.net/projects/mhash/files/mhash/0.9.9.9/mhash-0.9.9.9.tar.gz/download [root@localhost ~]# tar -zxvpf mhash-0.9.9.9.tar.gz [root@localhost ~]# cd mhash-0.9.9.9 [root@localhost ~]# ./configure --prefix=/usr/local [root@localhost ~]# make && make install |
mcrypt-2.6.8
|
1 2 3 4 5 6 7 |
[root@localhost ~]# cd /opt [root@localhost ~]# wget http://sourceforge.net/projects/mcrypt/files/MCrypt/2.6.8/mcrypt-2.6.8.tar.gz/download [root@localhost ~]# tar -zxvpf mcrypt-2.6.8.tar.gz [root@localhost ~]# cd mcrypt-2.6.8 [root@localhost ~]# /sbin/ldconfig [root@localhost ~]# LD_LIBRARY_PATH=/usr/local/lib ./configure [root@localhost ~]# make && make install |
設定軟連結
|
1 2 3 4 5 6 7 8 9 10 |
[root@localhost ~]# ln -s /usr/local/lib/libmcrypt.la /usr/lib/libmcrypt.la [root@localhost ~]# ln -s /usr/local/lib/libmcrypt.so /usr/lib/libmcrypt.so [root@localhost ~]# ln -s /usr/local/lib/libmcrypt.so.4 /usr/lib/libmcrypt.so.4 [root@localhost ~]# ln -s /usr/local/lib/libmcrypt.so.4.4.8 /usr/lib/libmcrypt.so.4.4.8 [root@localhost ~]# ln -s /usr/local/lib/libmhash.a /usr/lib/libmhash.a [root@localhost ~]# ln -s /usr/local/lib/libmhash.la /usr/lib/libmhash.la [root@localhost ~]# ln -s /usr/local/lib/libmhash.so /usr/lib/libmhash.so [root@localhost ~]# ln -s /usr/local/lib/libmhash.so.2 /usr/lib/libmhash.so.2 [root@localhost ~]# ln -s /usr/local/lib/libmhash.so.2.0.1 /usr/lib/libmhash.so.2.0.1 [root@localhost ~]# ln -s /usr/local/bin/libmcrypt-config /usr/bin/libmcrypt-config |
安装PHP 的FastCGI模式
由於使用 yum 安裝,而php-fpm在 php5.3.3 版本之後就已經被官方包入 PHP 內。因此不需要額外在特別安裝。
php-fpm 使用設定
|
1 2 3 4 |
[root@localhost ~]# chconfig php-fpm on #設定開機自動開啟 [root@localhost ~]# /etc/init.d/php-fpm start #啟動(或使用service php-fpm start) [root@localhost ~]# /etc/init.d/php-fpm stop #停止(或使用service php-fpm stop) [root@localhost ~]# /etc/init.d/php-fpm reload #重啟(或使用service php-fpm reload) |
安裝 PHP FastCGI模式的擴展模組
memcache
使用 yum 安裝的話會自動安裝memcache 3.0.7(beta)。不過當前穩定版的是2.2.7版,若想修改為2.2.7穩定版的話在操作下面步驟
|
1 2 3 4 5 6 7 |
[root@localhost ~]# cd /opt [root@localhost ~]# wget http://pecl.php.net/get/memcache-2.2.7.tgz [root@localhost ~]# tar -zxvpf memcache-2.2.7.tgz [root@localhost ~]# cd memcache-2.2.7 [root@localhost ~]# phpize [root@localhost ~]# ./configure --with-php-config=/usr/bin/php-config [root@localhost ~]# make && make install |
eaccelerator
eaccelerator 為開源碼,是 PHP 的加速器,對動態內容和 PHP腳本的暫存優化,使其程式碼執行效率提高1-10倍。
|
1 2 3 4 5 6 7 |
[root@localhost ~]# cd /opt [root@localhost ~]# wget http://download.faq-book.com/download/System/Linux/Nginx/eaccelerator-eaccelerator-42067ac.tar.gz [root@localhost ~]# tar -zxvpf eaccelerator-eaccelerator-42067ac.tar.gz [root@localhost ~]# cd eaccelerator-eaccelerator-42067ac [root@localhost ~]# phpize [root@localhost ~]# ./configure --enable-eaccelerator=shared --with-php-config=/usr/bin/php-config [root@localhost ~]# make && make install |
PDO_MYSQL
使用 yum 安裝的話會自動安裝,所以可略過
ImageMagick
在設定ImageMagick模組時,要先確定系統時間是否正確。
|
1 2 3 4 5 6 |
[root@localhost ~]# cd /opt [root@localhost ~]# wget ftp://mirror.aarnet.edu.au/pub/imagemagick/ImageMagick.tar.gz [root@localhost ~]# tar -zxvpf ImageMagick.tar.gz [root@localhost ~]# cd ImageMagick-6.8.0-6 [root@localhost ~]# ./configure [root@localhost ~]# make && make install |
imagick
此部份要注意一下,由於所安裝的PHP版本較新,所以在imagick的部份要安裝最新版本才不會有問題
|
1 2 3 4 5 6 7 8 |
[root@localhost ~]# cd /opt [root@localhost ~]# wget http://pecl.php.net/get/imagick-3.1.0RC2.tgz [root@localhost ~]# tar -zxvpf imagick-3.1.0RC2.tgz [root@localhost ~]# cd imagick-3.1.0RC2 [root@localhost ~]# phpize [root@localhost ~]# export PKG_CONFIG_PATH=/usr/local/lib/pkgconfig [root@localhost ~]# ./configure --with-php-config=/usr/bin/php-config [root@localhost ~]# make && make install |
修改php.ini
|
1 2 3 4 5 6 7 8 9 10 11 12 13 14 15 |
[root@localhost ~]# vim /usr/local/webserver/php/etc/php.ini # 先找到 extension_dir = "./" # 修改為 extension_dir = "/usr/lib64/php/modules/" # 然後在下方加入 extension = "imagick.so" # 再來找到 output_buffering = 4096 # 修改為 output_buffering = on |
安裝 Nginx
安裝 Nginx 所需要的 pcre
|
1 2 3 4 5 |
[root@localhost ~]# cd /opt [root@localhost ~]# wget http://ftp.exim.llorien.org/pcre/pcre-8.31.tar.gz [root@localhost ~]# tar -zxvpf pcre-8.31.tar.gz [root@localhost ~]# cd pcre-8.31 [root@localhost ~]# ./configure [root@localhost ~]# make && make install |
安裝 Nginx (官網說明)
由於安裝的環境為Centos 5.8,所以下載Centos 5 的就行了。
|
1 2 3 4 5 6 7 8 9 |
[root@localhost ~]# rpm -Uvh http://nginx.org/packages/centos/5/noarch/RPMS/nginx-release-centos-5-0.el5.ngx.noarch.rpm Retrieving http://nginx.org/packages/centos/5/noarch/RPMS/nginx-release-centos-5-0.el5.ngx.noarch.rpm warning: /var/tmp/rpm-xfer.2n5iXs: Header V3 RSA/SHA1 signature: NOKEY, key ID 7bd9bf62 Preparing... ########################################### [100%] 1:nginx-release-centos ########################################### [100%] [root@localhost ~]# yum install nginx [root@localhost ~]# rpm -qa |grep nginx nginx-release-centos-5-0.el5.ngx nginx-1.2.5-1.el5.ngx |
啟動服務
|
1 2 3 |
[root@localhost ~]# /etc/init.d/php-fpm start [root@localhost ~]# /etc/init.d/nginx start [root@localhost ~]# /etc/init.d/mysqld start |
設定開機啟動
設定開機啟動有三種方式請選一種設定就可以了。
|
1 2 3 |
[root@localhost ~]# chkconfig php-fpm on [root@localhost ~]# chkconfig nginx on [root@localhost ~]# chkconfig mysqld on |
查看進程是否正常
|
1 2 3 4 5 6 |
[root@localhost ~]# netstat -tulpn Active Internet connections (only servers) Proto Recv-Q Send-Q Local Address Foreign Address State PID/Program name tcp 0 0 127.0.0.1:9000 0.0.0.0:* LISTEN 7742/php-fpm tcp 0 0 0.0.0.0:3306 0.0.0.0:* LISTEN 8039/mysqld tcp 0 0 0.0.0.0:80 0.0.0.0:* LISTEN 7757/nginx |
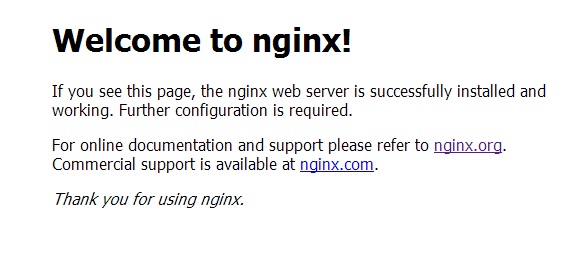
開網頁查看
在網址的地方輸入「http://ip或domain」。如果有看到出現「Welcome to nginx !」的字樣的話就表示安裝成功。接下來就是一些細部調整。
查看phpinfo.php
在查看phpinfo.php之前,要先讓 nginx 支援PHP
修改default.conf
找到以下設定把 # 去掉,在預設的情況下 PHP 服務器,監聽127.0.0.1:9000端口
|
1 2 3 4 5 6 7 8 9 10 11 12 13 14 15 16 17 18 19 20 21 22 |
[root@localhost ~]# vi /etc/nginx/conf.d/default.conf # 修改前 # pass the PHP scripts to FastCGI server listening on 127.0.0.1:9000 # # location ~ \.php$ { # root html; # fastcgi_pass 127.0.0.1:9000; # fastcgi_index index.php; # fastcgi_param SCRIPT_FILENAME /scripts$fastcgi_script_name; # include fastcgi_params; #} # 修改後 # pass the PHP scripts to FastCGI server listening on 127.0.0.1:9000 location ~ \.php { root html; fastcgi_pass 127.0.0.1:9000; fastcgi_index index.php; fastcgi_param SCRIPT_FILENAME /scripts$fastcgi_script_name; include fastcgi_params; } |
fastcgi_params
在加入的這行內容中,有一個 $document_root 請自行修改成web檔案所存放的路徑
|
1 2 3 |
[root@localhost ~]# vim /etc/nginx/fastcgi_params # 在最下方加入 fastcgi_param SCRIPT_FILENAME $document_root$fastcgi_script_name; |
新增phpinfo.php設定檔
|
1 2 3 4 |
[root@localhost ~]# vi index.php <?php phpinfo(); ?> |
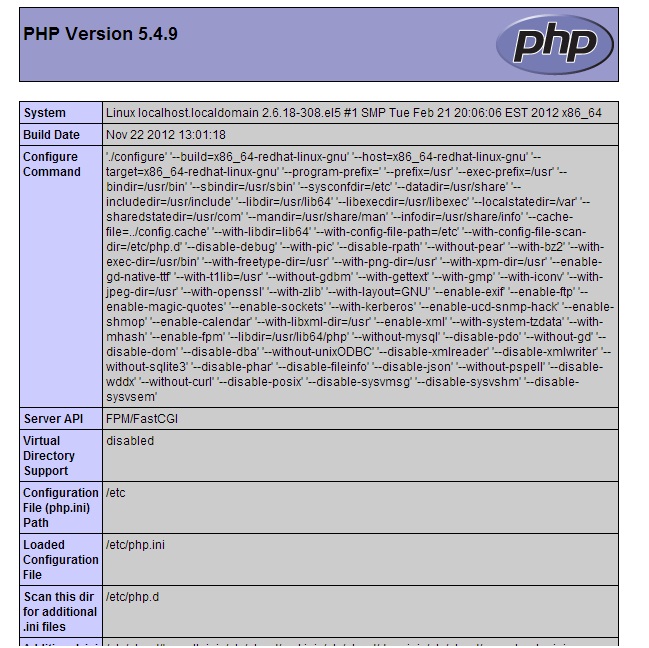
查看phpinfo.php
在都設定好後,可開啟網頁在網址的地方輸入「http://ip/phpinfo.php」就可看到以下內容
優化設定
nginx.conf說明
以下只針對重要和要修改的內容做說明
|
1 2 3 4 5 6 7 8 9 10 11 12 13 14 15 16 17 18 19 20 21 22 23 24 25 26 27 28 29 30 31 32 |
[root@localhost ~]# vi /etc/nginx/nginx.conf user nginx; worker_processes 10; # 根據CPU和記憶體配置,設置2到10都OK error_log /var/log/nginx/error.log warn; # error log的存放路徑 pid /var/run/nginx.pid; # pid的路徑 access_log /var/log/nginx/access.log main; # access_log的路徑 events { use epoll; # 啟用epoll worker_connections 1024; } http { include /etc/nginx/mime.types; default_type application/octet-stream; log_format main '$remote_addr - $remote_user [$time_local] "$request" ' '$status $body_bytes_sent "$http_referer" ' '"$http_user_agent" "$http_x_forwarded_for"'; access_log /var/log/nginx/access.log main; sendfile on; #tcp_nopush on; keepalive_timeout 65; # 連線timeout秒數 #gzip on; include /etc/nginx/conf.d/*.conf; # 啟動nginx 後自動抓取此路徑全部的.conf檔 } |
nginx.conf參數說明
以下是一些參數的調整和優化,可自行決定是否要增加或修改
|
1 2 3 4 5 6 7 8 9 10 11 12 13 14 15 16 17 18 19 20 21 22 23 24 25 26 27 28 |
#參數調整: sendfile on; tcp_nopush on; tcp_nodelay on; server_tokens off; keepalive_timeout 50; server_names_hash_bucket_size 128; client_header_buffer_size 32k; large_client_header_buffers 4 32k; client_max_body_size 50m; #Fastcgi優化: fastcgi_connect_timeout 300; fastcgi_send_timeout 300; fastcgi_read_timeout 300; fastcgi_buffer_size 64k; fastcgi_buffers 4 64k; fastcgi_busy_buffers_size 128k; fastcgi_temp_file_write_size 256k; #開啟gzip並優化: gzip on; gzip_min_length 1k; gzip_buffers 4 16k; gzip_http_version 1.0; gzip_comp_level 2; gzip_types text/plain application/x-javascript text/css application/xml; gzip_vary on; |
MySQL調整
修改my.cnf
|
1 2 3 4 5 6 7 8 9 10 11 12 13 14 15 16 17 18 19 20 21 22 23 24 25 26 27 28 29 30 31 32 33 34 35 36 37 38 39 40 41 42 43 44 45 46 47 48 49 50 51 52 53 54 |
[root@localhost ~]# vim /etc/my.cnf # 可依照自行的需求,在 [mysqld]內加入以下內容 skip-network skip-innodb # 取消文件系統的外部鎖 skip-locking skip-bdb # 不進行域名反解析,要注意帶來的權限問題 skip-name-resolve # 索引暫存,根據記憶體大小而定。如果是獨立的DB伺服器,可以設定最高50%的記憶體總量。 但如果是小記憶體的VPS,特別是Openvz的vps,建議設定為記憶體大小的25% key_buffer = 512M # 連接列表總數 back_log = 200 max_allowed_packet = 3M # 緩衝可從用的排程數 thread_cache = 128 thread_cache_size = 8 thread_stack = 64K # 打開暫存總數,可避免頻繁開啟數據列表產生的問題 table_cache = 512 # 每個排程所需要的緩衝 sort_buffer_size = 4M # 每個排程讀取索引所需要的緩衝 read_buffer_size = 4M # MyISAM表發生變化時重新排序所需要的緩衝 myisam_sort_buffer_size = 64M # 系統內核調整(查詢結果暫存) query_cache_size = 128M query_cache_limit = 1M # 設定時間斷線,必勉長時間連線 set-variable = wait_timeout=60 # 最大開發數,CPU數量*2 thread_concurrency = 4 # 記錄慢查詢,對慢查詢一一優化 log-slow-queries = slow.log long_query_time = 1 # 關閉不需要的表類型,若有使用到就不用加入此項 skip-innodb skip-bdb |
修改sysctl.conf
|
1 2 3 4 5 6 7 8 9 10 11 12 13 14 15 16 17 18 19 20 21 22 23 24 25 26 27 |
[root@localhost ~]# vim /etc/sysctl.conf #按Ctrl+g到最後一行加入以下內容 # Add net.ipv4.tcp_max_syn_backlog = 65536 net.core.netdev_max_backlog = 32768 net.core.somaxconn = 32768 net.core.wmem_default = 8388608 net.core.rmem_default = 8388608 net.core.rmem_max = 16777216 net.core.wmem_max = 16777216 net.ipv4.tcp_timestamps = 0 net.ipv4.tcp_synack_retries = 2 net.ipv4.tcp_syn_retries = 2 net.ipv4.tcp_tw_recycle = 1 #net.ipv4.tcp_tw_len = 1 net.ipv4.tcp_tw_reuse = 1 net.ipv4.tcp_mem = 94500000 915000000 927000000 net.ipv4.tcp_max_orphans = 3276800 #net.ipv4.tcp_fin_timeout = 30 #net.ipv4.tcp_keepalive_time = 120 net.ipv4.ip_local_port_range = 1024 65535 [root@localhost ~]# /sbin/sysctl -p #使設定立即生效 |
Nginx 的安裝到這邊就大致完成


評論
此文章尚無評論。