ghettoVCB-restore.sh 介紹
ghettoVCB-restore.sh 主要是用來還原備份,也屬於ghettoVCB中的一部份。
在這個腳本中支持兩個主要的用途
1. 還原一個VM的備份,包括所有在這個VM內的VMDK
2. 還原多個VM的備份,包括所有在這個VM內的VMDK
使用腳本時先注意,該還原目地有足夠的空間,然後在嘗試還原。以避免問題的產生。支持的還原格式: zeroedthick(default behavior)、2gbsparse、thin、eagerzeroedthick。
詳細內容可參考: VMware官網–ghettoVCB-restore.sh
使用需求
1. 需使用 ghettoVCB 備份
2. ESX(i) 3.5、4或5.x
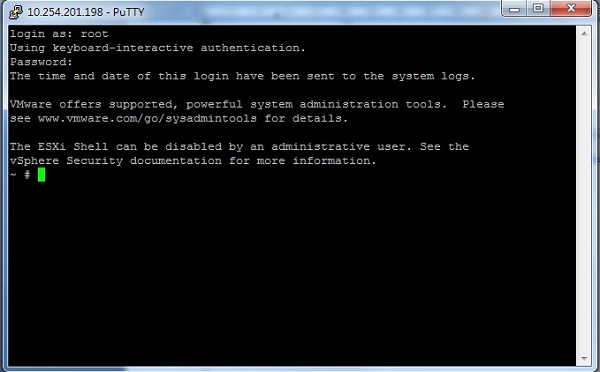
3. 使用SSH連線到該台ESXi host
前置作業
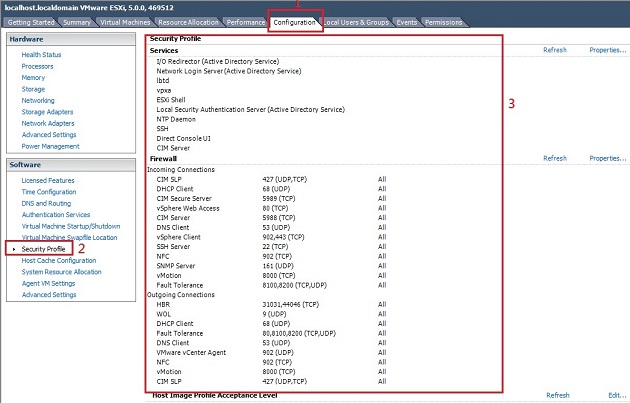
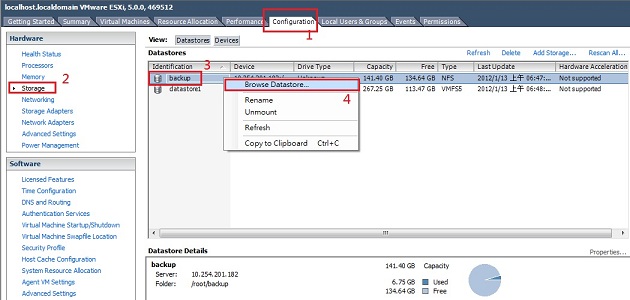
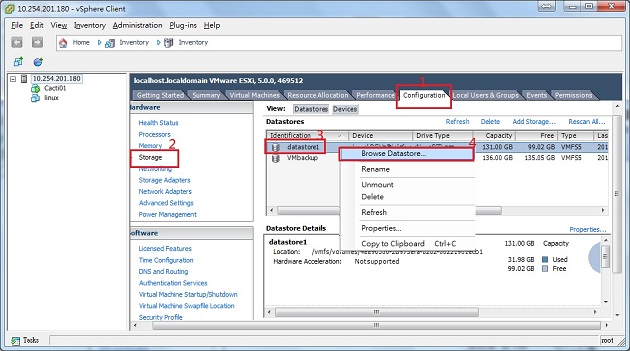
相信會使用到還原的部份,想必都已經下載好相關檔案才對。所以在此部份就簡單帶過,若有不懂的可參考 [VMware ESXi 備份 ghettoVCB.sh 基本設定]前半段設定。
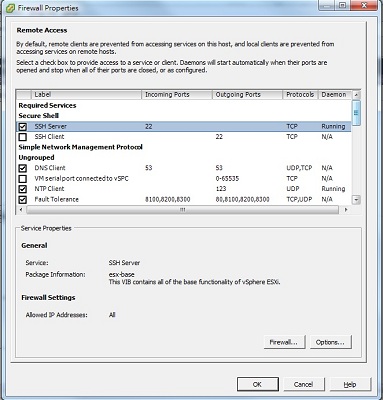
1. 開啟 SSH
2. 下載 ghettoVCB
官方載點 : Download as zip 、 Download as tar.gz
本站載點 : Download as zip 、 Download as tar.gz
在下載 ghettoVCB 檔案的部份會有兩個選項 [Download as zip] 和 [Download as tar.gz]。兩個檔案內容都一樣。所以可自行選擇要那一種方式。
在這邊選擇 [Download as tar.gz]的方式下載

3. 上傳 ghettoVCB
ghettoVCB-restore.sh 設定
注意事項
因5.1版為最新版本,而 ghettoVCB 尚未更新至最新板。如果是使用VMware ESXi 5.1版的,在 ghettoVCB-restore.sh 以下有個地方要修改。要不然在使用上會出現版本序號有問題。
大約在第87行會看到以下程式碼,請加入 || [[ "${ESX_VERSION}" == "5.1.0" ]]。多加上5.1版本的判斷。
這邊有修改好的 ghettoVCB-restore.sh
|
1 2 3 4 5 6 7 8 9 10 |
~ # vi ghettoVCB-restore.sh # 修改前 86 ESX_VERSION=$(vmware -v | awk '{print $3}') 87 if [ "${ESX_VERSION}" == "5.0.0" ]; then 88 VER=5 # 修改後 86 ESX_VERSION=$(vmware -v | awk '{print $3}') 87 if [ "${ESX_VERSION}" == "5.0.0" ] || [[ "${ESX_VERSION}" == "5.1.0" ]]; then 88 VER=5 |
修改前

修改後

1. 解壓縮上傳的資料
解壓縮後會看到ghettoVCB-restore.sh。此檔案就是用來設定備份還原。
|
1 2 3 4 5 6 7 8 9 10 11 12 13 14 |
~ # tar -zxvf lamw-ghettoVCB-518cef7.tar.gz tar: warning: skipping header 'g' lamw-ghettoVCB-518cef7/ lamw-ghettoVCB-518cef7/README lamw-ghettoVCB-518cef7/ghettoVCB-restore.sh lamw-ghettoVCB-518cef7/ghettoVCB-restore_vm_restore_configuration_template lamw-ghettoVCB-518cef7/ghettoVCB-vm_backup_configuration_template lamw-ghettoVCB-518cef7/ghettoVCB.conf lamw-ghettoVCB-518cef7/ghettoVCB.sh ~ # cd lamw-ghettoVCB-518cef7 ~ # ls ghettoVCB-vm_backup_configuration_template README ghettoVCB-restore.sh ghettoVCB.conf ghettoVCB-restore_vm_restore_configuration_template ghettoVCB.sh |
2. ghettoVCB-restore.sh參數使用說明
以下是ghettoVCB-restore.s相關參數的使用說明
|
1 2 3 4 5 6 7 8 9 10 11 12 13 14 15 16 17 18 19 20 21 22 23 24 25 26 27 28 29 30 31 32 33 |
~ # ./ghettoVCB-restore.sh ############################################################################### # # ghettoVCB-restore for ESX/ESXi 3.5, 4.x+ and 5.0 # Author: William Lam # http://www.virtuallyghetto.com/ # Documentation: http://communities.vmware.com/docs/DOC-8760 # Created: 08/18/2009 # Last modified: 2011_11_19_1 # ############################################################################### Usage: ./ghettoVCB-restore.sh -c [VM_BACKUP_UP_LIST] -l [LOG_FILE] -d [DRYRUN_DEBUG_INFO] OPTIONS: -c VM backup list (依造list中的設定還原備份) -l File ot output logging (指定LOG所要儲存的路徑) -d Dryrun/Debug Info [1|2] (可用來測試或是Debug還原看是否有誤) (e.g.) Output will go to stdout 針對list表中的VM虛擬機還原 ./ghettoVCB-restore.sh -c vms_to_restore Output will log to /tmp/ghettoVCB-restore.log 設定在虛擬機還原後的記錄LOG存放位置 ./ghettoVCB-restore.sh -c vms_to_restore -l /tmp/ghettoVCB-restore.log Dryrun/Debug Info (dryrun only) 可針對要還原的虛擬機做Dryrun/Debug ./ghettoVCB-restore.sh -c vms_to_restore -d 1 ./ghettoVCB-restore.sh -c vms_to_restore -d 2 |
3. 還原設定開始
3.1 建立還原使用的list
建立list主要是為了在還原的時後較為方便。然而在這一份list中有幾點要注意的。
(1) VM備份檔所在地的完整路徑。
(2) 恢復後的VM要存放的完整路徑
(3) 設定還原後硬碟的格式 (格式不懂的可以參考VMware vSphere(ESXi) 虛擬硬碟格式介紹)
格式代號 格式名稱
1 = zeroedthick (固定大小 不會初始化)
2 = 2gbsparse (特殊格式分割為數個2G的檔案)
3 = thin (動態大小)
4 = eagerzeroedthick (固定大小 會初始化)
(4) 此list請使用在ESX或ESXi主機上。請勿用在non-Linux/UNIX系統上,避免特殊符號影響導致腳本錯誤。
List 腳本格式
|
1 2 3 4 5 6 7 8 9 10 11 12 13 |
"/vmfs/volumes/datastore1/backup/VM1/VM1-2012-10-18_23-48-35;/vmfs/volumes/datastore1;4" "[VM備份檔所在地的完整路徑];[還原後的VM要存放的完整路徑];[還原硬碟的格式]" [VM備份檔所在地的完整路徑] : /vmfs/volumes/datastore1/backup/VM1/VM1-2012-10-18_23-48-35 [還原後的VM要存放的完整路徑] : /vmfs/volumes/datastore1 [還原硬碟的格式] : DISK_FORMATS 1 = zeroedthick 2 = 2gbsparse 3 = thin 4 = eagerzeroedthick 在這邊要注意一下是「;」而不是「:」 |
List設定範例
在list設定裡可以直接把硬碟的格式代號也加入,方便日後查詢。不過要記得 # 才不會影響到腳本。
|
1 2 3 4 5 6 7 8 9 10 |
~ # vi vms_to_restore # DISK_FORMATS # 1 = zeroedthick # 2 = 2gbsparse # 3 = thin # 4 = eagerzeroedthick # e.g. "/vmfs/volumes/datastore1/backup/VM1/VM1-2012-10-18_23-48-35;/vmfs/volumes/datastore1;4" # 在這邊要注意一下是「;」而不是「:」 |
3.2 測試Dryrun/Debug
設定好vms_to_restore後,可以使用Dryrun/Debug來測試看看腳本和vms_to_restore是否有問題。若是有問題,過程中會報錯。
|
1 2 3 4 5 6 7 |
Dryrun/Debug Info [1|2] Dryrun: ~ # ./ghettoVCB-restore.sh -c vms_to_restore -d 1 Debug: ~ # ./ghettoVCB-restore.sh -c vms_to_restore -d 2 |
3.3 還原備份
要還原備份時請使用參數「-c」然後接 vms_to_restore 也就是剛剛所設定的list
參數說明
|
1 2 3 |
~ # ./ghettoVCB-restore.sh -c vms_to_restore -c : 依照List中的設定還原備份 vms_to_restore : 設定list |
開始還原
|
1 2 3 4 5 6 7 8 9 10 11 12 13 14 15 16 17 18 19 20 |
~ # ./ghettoVCB-restore.sh -c vms_to_restore ################## Restoring VM: test ##################### Start time: Wed Jan 11 23:52:11 UTC 2012 Restoring VM from: "/vmfs/volumes/datastore1/backup/backup/test/test-2012-10-18_23-48-35" Restoring VM to Datastore: "/vmfs/volumes/datastore1" using Disk Format: "eagerzeroedthick" Creating VM directory: "/vmfs/volumes/datastore1/test-2012-10-18_23-48-35" ... Copying "test.vmx" file ... Restoring VM's VMDK(s) ... Updating VMDK entry in "test.vmx" file ... Destination disk format: VMFS eagerzeroedthick Cloning disk '/vmfs/volumes/datastore1/backup/backup/test/test-2012-10-18_23-48-35/test.vmdk'... Clone: 100% done. Registering test ... 23 End time: Wed Jan 11 23:52:29 UTC 2012 ################## Completed restore for test! ##################### Start time: Wed Jan 11 23:52:11 UTC 2012 End time: Wed Jan 11 23:52:29 UTC 2012 Duration : 18 Seconds |
查看還原
還原完成後開啟VMware vSphere Client會看到剛剛所還原回去的VM已經掛上了。
接下來就可以開啟VM後測試看試否有問題。

4 備份log設定
如果要設定log的話,會建議把log存在不會因重開機,而刪檔的地方。
若只是要測試的話就放在/tmp下就可以了。
參數說明
|
1 2 |
~ # ./ghettoVCB-restore.sh -c vms_to_restore -l /vmfs/volumes/datastore1/log/ghettoVCB-restore.log ~ # ./[ghettoVCB-restore.sh] -c [list] -l [Log存放路徑] |
還原備份並設定LOG存放處
|
1 2 3 4 5 6 7 8 9 10 11 12 13 14 15 16 17 18 |
~ # ./ghettoVCB-restore.sh -c vms_to_restore -l /vmfs/volumes/datastore1/log/ghettoVCB-restore.log Logging output to "/tmp/ghettoVCB-restore.log" ... Destination disk format: VMFS eagerzeroedthick Cloning disk '/vmfs/volumes/datastore1/backup/backup/test/test-2012-10-18_23-48-35/test.vmdk'... Clone: 100% done. #備份完成,到LOG存放地方查看log ~ # cat/vmfs/volumes/datastore1/log/ghettoVCB-restore.log Destination disk format: VMFS eagerzeroedthick Cloning disk '/vmfs/volumes/datastore1/backup/backup/test/test-2012-10-18_23-48-35/test.vmdk'... Clone: 100% done. Registering test ... End time: Thu Jan 12 00:05:47 UTC 2012 ################## Completed restore for test! ##################### Start time: Thu Jan 12 00:05:30 UTC 2012 End time: Thu Jan 12 00:05:47 UTC 2012 Duration : 17 Seconds |
到這邊備份還原的部份就ok了,剩下運用的部份就由個人自行發揮。


評論
此文章尚無評論。