更新日期: 2012.11.29
此篇文章已不更新
最新內容更新請參考此篇
[Nginx 安裝教學(Nginx1.2.5+PHP5.3.19+MySQL5.5.27)]
有關Nginx的相關說明,在這邊就不再多說了。有興趣想了解的可以參考以下網址 :
http://wiki.nginx.org/NginxChs
http://en.wikipedia.org/wiki/Nginx
主機環境 :
Centos 5.5
安裝項目 :
Nginx1.0.4
PHP5.3.6
MySQL5.5
操作步驟 :
一、更新所需的安裝包
| [root@localhost ~]# yum -y install gcc gcc-c++ autoconf libjpeg libjpeg-devel libpng libpng-devel freetype freetype-devel libxml2 libxml2-devel zlib zlib-devel glibc glibc-devel glib2 glib2-devel bzip2 bzip2-devel ncurses ncurses-devel curl curl-devel e2fsprogs e2fsprogs-devel krb5 krb5-devel libidn libidn-devel openssl openssl-devel openldap openldap-devel nss_ldap openldap-clients openldap-servers vsftpd patch zip
|
二、下載所需要用到程式的開源碼
這邊都統一放在/home/derek/
| [root@localhost ~]# cd /home/derek
wget http://nginx.org/download/nginx-1.0.4.tar.gz wget http://tw2.php.net/get/php-5.3.6.tar.gz/from/this/mirror wget http://mysql.ntu.edu.tw/Downloads/MySQL-5.5/mysql-5.5.14.tar.gz wget http://ftp.gnu.org/pub/gnu/libiconv/libiconv-1.13.tar.gz wget ftp://ftp.eenet.ee/pub/FreeBSD/distfiles/libmcrypt-2.5.8.tar.gz wget http://sourceforge.net/projects/mcrypt/files/MCrypt/2.6.8/mcrypt-2.6.8.tar.gz/download wget http://pecl.php.net/get/memcache-2.2.6.tgz wget http://sourceforge.net/projects/mhash/files/mhash/0.9.9.9/mhash-0.9.9.9.tar.gz/download wget http://ftp.exim.llorien.org/pcre/pcre-8.12.tar.gz wget http://acelnmp.googlecode.com/files/eaccelerator-0.9.6.1.tar.bz2 wget http://pecl.php.net/get/PDO_MYSQL-1.0.2.tgz wget http://blog.s135.com/soft/linux/nginx_php/imagick/ImageMagick.tar.gz wget http://pecl.php.net/get/imagick-3.0.1.tgz |
三、安装PHP 5.3.6(FastCGI模式)
編譯安裝PHP5.3.6所需要的套件
| libiconv-1.13
[root@localhost ~]# tar -zxvpf libiconv-1.13.tar.gz [root@localhost ~]# cd libiconv-1.13 [root@localhost ~]# ./configure –prefix=/usr/local [root@localhost ~]# make [root@localhost ~]# make install [root@localhost ~]# cd ..
libmcrypt-2.5.8 [root@localhost ~]# tar -zxvpf libmcrypt-2.5.8.tar.gz [root@localhost ~]# cd libmcrypt-2.5.8 [root@localhost ~]# ./configure [root@localhost ~]# make [root@localhost ~]# make install [root@localhost ~]# /sbin/ldconfig [root@localhost ~]# cd libltdl/ [root@localhost ~]# ./configure –enable-ltdl-install [root@localhost ~]# make [root@localhost ~]# make install [root@localhost ~]# cd ../../
mhash-0.9.9.9 [root@localhost ~]# tar -zxvpf mhash-0.9.9.9.tar.gz [root@localhost ~]# cd mhash-0.9.9.9 [root@localhost ~]# ./configure [root@localhost ~]# make [root@localhost ~]# make install [root@localhost ~]# cd ../
[root@localhost ~]# ln -s /usr/local/lib/libmcrypt.la /usr/lib/libmcrypt.la [root@localhost ~]# ln -s /usr/local/lib/libmcrypt.so /usr/lib/libmcrypt.so [root@localhost ~]# ln -s /usr/local/lib/libmcrypt.so.4 /usr/lib/libmcrypt.so.4 [root@localhost ~]# ln -s /usr/local/lib/libmcrypt.so.4.4.8 /usr/lib/libmcrypt.so.4.4.8 [root@localhost ~]# ln -s /usr/local/lib/libmhash.a /usr/lib/libmhash.a [root@localhost ~]# ln -s /usr/local/lib/libmhash.la /usr/lib/libmhash.la [root@localhost ~]# ln -s /usr/local/lib/libmhash.so /usr/lib/libmhash.so [root@localhost ~]# ln -s /usr/local/lib/libmhash.so.2 /usr/lib/libmhash.so.2 [root@localhost ~]# ln -s /usr/local/lib/libmhash.so.2.0.1 /usr/lib/libmhash.so.2.0.1 [root@localhost ~]# ln -s /usr/local/bin/libmcrypt-config /usr/bin/libmcrypt-config
mcrypt-2.6.8 [root@localhost ~]# tar -zxvpf mcrypt-2.6.8.tar.gz [root@localhost ~]# cd mcrypt-2.6.8 [root@localhost ~]# /sbin/ldconfig [root@localhost ~]# ./configure [root@localhost ~]# make [root@localhost ~]# make install [root@localhost ~]# cd ..
|
四、編譯 安裝 MySQL 5.5.14
先需要安装cmake
| [root@localhost ~]# cd /home/derek/
[root@localhost ~]# wget http://www.cmake.org/files/v2.8/cmake-2.8.5.tar.gz [root@localhost ~]# tar -zcvpf cmake-2.8.5.tar.gz [root@localhost ~]# cd cmake-2.8.5 [root@localhost ~]# ./bootstrap –prefix=/usr/local/cmake [root@localhost ~]# gmake [root@localhost ~]# gmake install
修改 centos環境變數 [root@localhost ~]# vim /etc/profile 找到export PATH USER LOGNAME MAIL HOSTNAME HISTSIZE INPUTRC 下一行加入 export PATH=/usr/local/cmake/bin:$PATH 儲存後重啟centos |
編譯 MySQL 5.5.14
| [root@localhost ~]# /usr/sbin/groupadd mysql
[root@localhost ~]# /usr/sbin/useradd -g mysql mysql [root@localhost ~]# tar -zxvpf mysql-5.5.14.tar.gz [root@localhost ~]# cd mysql-5.5.14 [root@localhost ~]# cmake . -DCMAKE_INSTALL_PREFIX=/usr/local/webserver/mysql/ [root@localhost ~]# make [root@localhost ~]# make install [root@localhost ~]# chmod +w /usr/local/webserver/mysql [root@localhost ~]# chown -R mysql:mysql /usr/local/webserver/mysql [root@localhost ~]# cd .. |
PS: 以下步驟,若想要在伺服器上執行MySQL的話,請執行下列幾步。但如果只是想讓PHP支持MySQL,能連接其他伺服器上的MySQL,則以下1和2步驟不用執行。
1.建立MySQL存放目錄
| [root@localhost ~]# mkdir -p /data0/mysql/3306/data/
[root@localhost ~]# mkdir -p /data0/mysql/3306/binlog/ [root@localhost ~]# chown -R mysql:mysql /data0/mysql/ |
2.用MySQL用戶帳號的身份來建立資料表
| [root@localhost~]# /usr/local/webserver/mysql/scripts/mysql_install_db — basedir=/usr/local/webserver/mysql –datadir=/data0/mysql/3306/data –user=mysql |
3.建立my.cnf文件
| [root@localhost ~]# vi /data0/mysql/3306/my.cnf
#輸入以下內容: [client] character-set-server = utf8 port = 3306 socket = /tmp/mysql.sock [mysqld] character-set-server = utf8 replicate-ignore-db = mysql replicate-ignore-db = test replicate-ignore-db = information_schema user = mysql port = 3306 socket = /tmp/mysql.sock basedir = /usr/local/webserver/mysql datadir = /data0/mysql/3306/data log-error = /data0/mysql/3306/mysql_error.log pid-file = /data0/mysql/3306/mysql.pid open_files_limit = 10240 back_log = 600 max_connections = 5000 max_connect_errors = 6000 table_cache = 614 external-locking = FALSE max_allowed_packet = 32M sort_buffer_size = 1M join_buffer_size = 1M thread_cache_size = 300 #thread_concurrency = 8 query_cache_size = 512M query_cache_limit = 2M query_cache_min_res_unit = 2k default-storage-engine = MyISAM thread_stack = 192K transaction_isolation = READ-COMMITTED tmp_table_size = 246M max_heap_table_size = 246M long_query_time = 3 log-slave-updates log-bin = /data0/mysql/3306/binlog/binlog binlog_cache_size = 4M binlog_format = MIXED max_binlog_cache_size = 8M max_binlog_size = 1G relay-log-index = /data0/mysql/3306/relaylog/relaylog relay-log-info-file = /data0/mysql/3306/relaylog/relaylog relay-log = /data0/mysql/3306/relaylog/relaylog expire_logs_days = 30 key_buffer_size = 256M read_buffer_size = 1M read_rnd_buffer_size = 16M bulk_insert_buffer_size = 64M myisam_sort_buffer_size = 128M myisam_max_sort_file_size = 10G myisam_repair_threads = 1 myisam_recover
interactive_timeout = 120 wait_timeout = 120
skip-name-resolve #master-connect-retry = 10 slave-skip-errors = 1032,1062,126,1114,1146,1048,1396
#master-host = 192.168.1.2 #master-user = username #master-password = password #master-port = 3306
server-id = 1
innodb_additional_mem_pool_size = 16M innodb_buffer_pool_size = 512M innodb_data_file_path = ibdata1:256M:autoextend innodb_file_io_threads = 4 innodb_thread_concurrency = 8 innodb_flush_log_at_trx_commit = 2 innodb_log_buffer_size = 16M innodb_log_file_size = 128M innodb_log_files_in_group = 3 innodb_max_dirty_pages_pct = 90 innodb_lock_wait_timeout = 120 innodb_file_per_table = 0
#log-slow-queries = /data0/mysql/3306/slow.log #long_query_time = 10
[mysqldump] quick max_allowed_packet = 32M |
4.建立管理MySQL的shell(此shell的用途為管理MySQL的開關)
| [root@localhost ~]# vi /data0/mysql/3306/mysql
#輸入以下內容 : #!/bin/sh
mysql_port=3306 mysql_username=”admin” mysql_password=”12345678″
function_start_mysql() { printf “Starting MySQL…\n” /bin/sh /usr/local/webserver/mysql/bin/mysqld_safe –defaults-file=/data0/mysql/{mysql_port}/my.cnf 2>&1 > /dev/null & }
function_stop_mysql() { printf “Stoping MySQL…\n” /usr/local/webserver/mysql/bin/mysqladmin -u ${mysql_username} -p${mysql_password} -S /tmp/mysql.sock shutdown }
function_restart_mysql() { printf “Restarting MySQL…\n” function_stop_mysql sleep 5 function_start_mysql }
function_kill_mysql() { kill -9 $(ps -ef | grep ‘bin/mysqld_safe’ | grep ${mysql_port} | awk ‘{printf $2}’) kill -9 $(ps -ef | grep ‘libexec/mysqld’ | grep ${mysql_port} | awk ‘{printf $2}’) }
if [ "$1" = "start" ]; then function_start_mysql elif [ "$1" = "stop" ]; then function_stop_mysql elif [ "$1" = "restart" ]; then function_restart_mysql elif [ "$1" = "kill" ]; then function_kill_mysql else printf “Usage: /data0/mysql/{mysql_port}/mysql {start|stop|restart|kill}\n” fi |
5. 給shell可執行的權限
| [root@localhost ~]# chmod +x /data0/mysql/3306/mysql |
6.啟動MySQL
| [root@localhost ~]# /data0/mysql/3306/mysql start |
7.登入到MySQL裡(尚未設定相關帳密,此部份先按Enter即可)
| [root@localhost ~]# /usr/local/webserver/mysql/bin/mysql -u root -p -S /tmp/mysql.sock |
8.建立具有root權限的用戶。(帳號:admin,密碼:12345678。帳密部份可自行修改,但若有修改的話vi /data0/mysql/3306/mysql也須要一起修改)
| mysql> GRANT ALL PRIVILEGES ON *.* TO ‘admin’@'localhost’ IDENTIFIED BY ’12345678′;
mysql> GRANT ALL PRIVILEGES ON *.* TO ‘admin’@’127.0.0.1′ IDENTIFIED BY ’12345678′; |
9.停用MySQL
| [root@localhost ~]# /data0/mysql/3306/mysql stop |
五、編譯安裝PHP(FastCGI模式)
1. 編譯 安裝PHP
| [root@localhost ~]# ln -s /usr/local/webserver/mysql/lib/libmysqlclient.so.18 /usr/local/lib
[root@localhost ~]# tar -zxvpf php-5.3.6.tar.gz [root@localhost ~]# cd php-5.3.6 [root@localhost ~]#./configure –prefix=/usr/local/webserver/php –with-config-file-path=/usr/local/webserver/php/etc –with-mysql=/usr/local/webserver/mysql –with-mysqli=/usr/local/webserver/mysql/bin/mysql_config –with-iconv-dir=/usr/local/lib –with-freetype-dir=/usr/local/lib –with-jpeg-dir=/usr/local/lib –with-png-dir=/usr/local/lib –with-zlib –with-libxml-dir=/usr –enable-xml –disable-rpath –enable-discard-path –enable-safe-mode –enable-bcmath –enable-shmop –enable-sysvsem –enable-inline-optimization –with-curl –with-curlwrappers –enable-mbregex –enable-fastcgi –enable-fpm –enable-force-cgi-redirect –enable-mbstring –with-mcrypt –with-gd –enable-gd-native-ttf –with-openssl –with-mhash –enable-pcntl –enable-sockets –with-ldap –with-ldap-sasl –with-xmlrpc –enable-zip –enable-soap [root@localhost ~]# make ZEND_EXTRA_LIBS=’-liconv’ [root@localhost ~]# make install [root@localhost ~]# cp /etc/php.ini /usr/local/webserver/php/etc/ |
2. 安裝PHP-fpm
| [root@localhost ~]# useradd php-fpm
[root@localhost ~]# cd /home/derek/php-5.3.6 #此為php-5.3.6的下載存放路徑 [root@localhost ~]# cp -f sapi/fpm/init.d.php-fpm /etc/init.d/php-fpm [root@localhost ~]# chmod 755 /etc/init.d/php-fpm [root@localhost ~]# cp -f sapi/fpm/php-fpm.conf.in /usr/local/webserver/php/etc/php-fpm.conf [root@localhost ~]# vim /usr/local/webserver/php/etc/php-fpm.conf #請更換為以下內容 pid = /usr/local/webserver/php/var/run/php-fpm.pid listen = 127.0.0.1:9000 pm.min_spare_servers = 3 pm.start_servers = 20
#以下是一些常用的操作 [root@localhost ~]# /sbin/chkconfig –add php-fpm #加入到開機服務列表 [root@localhost ~]# /sbin/chkconfig php-fpm on #設定開機自動開啟 [root@localhost ~]# /etc/init.d/php-fpm start #啟動(或使用service php-fpm start) [root@localhost ~]# /etc/init.d/php-fpm stop #停止(或使用service php-fpm stop) [root@localhost ~]# /etc/init.d/php-fpm reload #重啟(或使用service php-fpm reload) |
3. 編譯安裝PHP5擴展模組
| memcache-2.2.6
[root@localhost ~]# tar -zxvpf memcache-2.2.6.tgz [root@localhost ~]# cd memcache-2.2.6 [root@localhost ~]# /usr/local/webserver/php/bin/phpize [root@localhost ~]# ./configure –with-php-config=/usr/local/webserver/php/bin/php-config [root@localhost ~]# make [root@localhost ~]# make install [root@localhost ~]# cd ..
eaccelerator-0.9.6.1 [root@localhost ~]# tar -jxvpf eaccelerator-0.9.6.1.tar.bz2 [root@localhost ~]# cd eaccelerator-0.9.6.1ls [root@localhost ~]# /usr/local/webserver/php/bin/phpize [root@localhost ~]# ./configure –enable-eaccelerator=shared –with-php-config=/usr/local/webserver/php/bin/php-config [root@localhost ~]# make [root@localhost ~]# make install [root@localhost ~]# cd ..
PDO_MYSQL-1.0.2 [root@localhost ~]# tar -zxvpf PDO_MYSQL-1.0.2.tgz [root@localhost ~]# cd PDO_MYSQL-1.0.2 [root@localhost ~]# /usr/local/webserver/php/bin/phpize [root@localhost ~]# ./configure –with-php-config=/usr/local/webserver/php/bin/php-config –with-pdo-mysql=/usr/local/webserver/mysql [root@localhost ~]# make [root@localhost ~]# make install [root@localhost ~]# cd ..
ImageMagick [root@localhost ~]# tar -zxvpf ImageMagick.tar.gz [root@localhost ~]# cd ImageMagick-6.5.1-2 [root@localhost ~]# ./configure [root@localhost ~]# make [root@localhost ~]# make install [root@localhost ~]# cd ..
imagick-3.0.1 [root@localhost ~]# tar -zxvpf imagick-3.0.1.tgz [root@localhost ~]# cd imagick-3.0.1 [root@localhost ~]# /usr/local/webserver/php/bin/phpize [root@localhost ~]# ./configure –with-php-config=/usr/local/webserver/php/bin/php-config [root@localhost ~]# make [root@localhost ~]# make install [root@localhost ~]# cd .. |
4. 修改php.ini
| [root@localhost ~]# vim /usr/local/webserver/php/etc/php.ini
#找到extension_dir = “/usr/lib64/php/modules” #修改為 extension_dir = “/usr/local/webserver/php/lib/php/extensions/no-debug-non-zts-20090626/” #然後在下方加入 extension = “memcache.so” #再來找到 output_buffering = 4096 #改為 output_buffering = on
#若是不想手動修改可下以下指令 [root@localhost ~]# sed -i ‘s#extension_dir = “./”#extension_dir = “/usr/local/webserver/php/lib/php/extensions/no-debug-non-zts-20090626/”\nextension = “memcache.so”\nextension = “pdo_mysql.so”\nextension = “imagick.so”\n#’ /usr/local/webserver/php/etc/php.ini [root@localhost ~]# sed -i ‘s#output_buffering = Off#output_buffering = On#’ /usr/local/webserver/php/etc/php.ini [root@localhost ~]# sed -i “s#; always_populate_raw_post_data = On#always_populate_raw_post_data = On#g” /usr/local/webserver/php/etc/php.ini [root@localhost ~]# sed -i “s#; cgi.fix_pathinfo=0#cgi.fix_pathinfo=0#g” /usr/local/webserver/php/etc/php.ini |
5.配置eaccelerator 加速PHP
| [root@localhost ~]# mkdir -p /usr/local/webserver/eaccelerator_cache
[root@localhost ~]# vim /usr/local/webserver/php/etc/php.ini #到文件最後面加上以下資料(可按shift+g到最後) [eaccelerator] zend_extension=”/usr/local/webserver/php/lib/php/extensions/no-debug-non-zts-20090626/eaccelerator.so” eaccelerator.shm_size=”64″ eaccelerator.cache_dir=”/usr/local/webserver/eaccelerator_cache” eaccelerator.enable=”1″ eaccelerator.optimizer=”1″ eaccelerator.check_mtime=”1″ eaccelerator.debug=”0″ eaccelerator.filter=”" eaccelerator.shm_max=”0″ eaccelerator.shm_ttl=”3600″ eaccelerator.shm_prune_period=”3600″ eaccelerator.shm_only=”0″ eaccelerator.compress=”1″ eaccelerator.compress_level=”9″ |
6. 建立www使用者和群組,以及建立網頁資料存放目錄
| [root@localhost ~]# /usr/sbin/groupadd www
[root@localhost ~]# /usr/sbin/useradd -g www www [root@localhost ~]# mkdir -p [root@localhost ~]# mkdir -p /var/www/blog [root@localhost ~]# chmod +w /var/www/blog [root@localhost ~]# chown -R www:www /var/www/blog |
六、安裝Nginx
1. 安裝Nginx所需要的pcre
| [root@localhost ~]# tar -zxvpf pcre-8.12.tar.gz
[root@localhost ~]# cd pcre-8.12 [root@localhost ~]# ./configure [root@localhost ~]# make && make install [root@localhost ~]# cd .. |
2. 安裝Nginx
| [root@localhost ~]# tar -zxvpf nginx-1.0.4.tar.gz
[root@localhost ~]# cd nginx-1.0.4 [root@localhost ~]# ./configure –user=www –group=www –prefix=/usr/local/webserver/nginx –with-http_stub_status_module –with-http_ssl_module [root@localhost ~]# make && make install [root@localhost ~]# cd .. |
3. 建立Nginx log目錄
| [root@localhost ~]# mkdir -p /data0/logs
[root@localhost ~]# chmod +w /data0/logs [root@localhost ~]# chown -R www:www /data0/logs |
4. 建立nginx.conf和fcgi.conf
在/usr/local/webserver/nginx/conf/ 目錄中重新建立一個新的nginx.conf
| [root@localhost ~]# rm -f /usr/local/webserver/nginx/conf/nginx.conf
[root@localhost ~]# vi /usr/local/webserver/nginx/conf/nginx.conf #加入以下內容: user www www;
worker_processes 8;
error_log /data0/logs/nginx_error.log crit;
pid /usr/local/webserver/nginx/nginx.pid;
#Specifies the value for maximum file descriptors that can be opened by this process. worker_rlimit_nofile 65535;
events { use epoll; worker_connections 65535; }
http { include mime.types; default_type application/octet-stream;
#charset gb2312;
server_names_hash_bucket_size 128; client_header_buffer_size 32k; large_client_header_buffers 4 32k; client_max_body_size 8m;
sendfile on; tcp_nopush on;
keepalive_timeout 60;
tcp_nodelay on;
fastcgi_connect_timeout 300; fastcgi_send_timeout 300; fastcgi_read_timeout 300; fastcgi_buffer_size 64k; fastcgi_buffers 4 64k; fastcgi_busy_buffers_size 128k; fastcgi_temp_file_write_size 128k;
gzip on; gzip_min_length 1k; gzip_buffers 4 16k; gzip_http_version 1.0; gzip_comp_level 2; gzip_types text/plain application/x-javascript text/css application/xml; gzip_vary on;
#limit_zone crawler $binary_remote_addr 10m;
server { listen 80; server_name blog.faq-book.com; index index.html index.htm index.php; root /var/www/blog;
#limit_conn crawler 20;
location ~ .*\.(php|php5)?$ { #fastcgi_pass unix:/tmp/php-cgi.sock; fastcgi_pass 127.0.0.1:9000; fastcgi_index index.php; include fcgi.conf; }
location ~ .*\.(gif|jpg|jpeg|png|bmp|swf)$ { expires 30d; }
location ~ .*\.(js|css)?$ { expires 1h; }
log_format access ’$remote_addr – $remote_user [$time_local] “$request” ‘ ’$status $body_bytes_sent “$http_referer” ‘ ’”$http_user_agent” $http_x_forwarded_for’; access_log /data0/logs/access.log access; }
server { listen 80; server_name www.faq-book.com; index index.html index.htm index.php; root /var/www/html;
location ~ .*\.(php|php5)?$ { #fastcgi_pass unix:/tmp/php-cgi.sock; fastcgi_pass 127.0.0.1:9000; fastcgi_index index.php; include fcgi.conf; }
log_format wwwlogs ’$remote_addr – $remote_user [$time_local] “$request” ‘ ’$status $body_bytes_sent “$http_referer” ‘ ’”$http_user_agent” $http_x_forwarded_for’; access_log /data0/logs/wwwlogs.log wwwlogs; }
server { listen 80; server_name status. blog.faq-book.com;
location / { stub_status on; access_log off; } } } #如果有做過修改的話可用以下指定測試修改後是否有問題 [root@localhost ~]# /usr/local/webserver/nginx/sbin/nginx –t #如果測試後結果如下 就表示修改沒問題 nginx: the configuration file /usr/local/webserver/nginx/conf/nginx.conf syntax is ok nginx: configuration file /usr/local/webserver/nginx/conf/nginx.conf test is successful
#在不停止Nginx服務情況下,重啟Nginx [root@localhost ~]# /usr/local/webserver/nginx/sbin/nginx -s reload |
在/usr/local/webserver/nginx/conf/ 目錄中建立一個新的fcgi.conf
| [root@localhost ~]# vi /usr/local/webserver/nginx/conf/fcgi.conf
#加入以下內容: fastcgi_param GATEWAY_INTERFACE CGI/1.1; fastcgi_param SERVER_SOFTWARE nginx;
fastcgi_param QUERY_STRING $query_string; fastcgi_param REQUEST_METHOD $request_method; fastcgi_param CONTENT_TYPE $content_type; fastcgi_param CONTENT_LENGTH $content_length;
fastcgi_param SCRIPT_FILENAME $document_root$fastcgi_script_name; fastcgi_param SCRIPT_NAME $fastcgi_script_name; fastcgi_param REQUEST_URI $request_uri; fastcgi_param DOCUMENT_URI $document_uri; fastcgi_param DOCUMENT_ROOT $document_root; fastcgi_param SERVER_PROTOCOL $server_protocol;
fastcgi_param REMOTE_ADDR $remote_addr; fastcgi_param REMOTE_PORT $remote_port; fastcgi_param SERVER_ADDR $server_addr; fastcgi_param SERVER_PORT $server_port; fastcgi_param SERVER_NAME $server_name;
# PHP only, required if PHP was built with –enable-force-cgi-redirect fastcgi_param REDIRECT_STATUS 200; |
啟動 停止 Nginx
| [root@localhost ~]# ulimit -SHn 65535
[root@localhost ~]# /usr/local/webserver/nginx/sbin/nginx #開啟 [root@localhost ~]# /usr/local/webserver/nginx/sbin/nginx -s stop #停止 |
七、設定開機後自動啟動Nginx和PHP
| [root@localhost ~]# vi /etc/rc.d/rc.local
#在最後面加入以下內容 ulimit -SHn 65535 /data0/mysql/3306/mysql start
#或是直接輸入 [root@localhost ~]# echo “ulimit -SHn 65535″ >> /etc/rc.d/rc.local [root@localhost ~]# echo “/etc/init.d/php-fpm start ” >> /etc/rc.d/rc.local [root@localhost ~]# echo “/usr/local/webserver/nginx/sbin/nginx” >> /etc/rc.d/rc.local [root@localhost ~]# echo “/data0/mysql/3306/mysql start” >> /etc/rc.d/rc.local |
八、優化Linux內核參數
| [root@localhost ~]# vi /etc/sysctl.conf
#到最後面加入以下內容 : # Add net.ipv4.tcp_max_syn_backlog = 65536 net.core.netdev_max_backlog = 32768 net.core.somaxconn = 32768
net.core.wmem_default = 8388608 net.core.rmem_default = 8388608 net.core.rmem_max = 16777216 net.core.wmem_max = 16777216
net.ipv4.tcp_timestamps = 0 net.ipv4.tcp_synack_retries = 2 net.ipv4.tcp_syn_retries = 2
net.ipv4.tcp_tw_recycle = 1 #net.ipv4.tcp_tw_len = 1 net.ipv4.tcp_tw_reuse = 1
net.ipv4.tcp_mem = 94500000 915000000 927000000 net.ipv4.tcp_max_orphans = 3276800
#net.ipv4.tcp_fin_timeout = 30 #net.ipv4.tcp_keepalive_time = 120 net.ipv4.ip_local_port_range = 1024 65535 [root@localhost ~]# /sbin/sysctl –p #使設定立即生效 |
九、設定定時分割Nginx log 的腳本
1. 建立新腳本
| [root@localhost ~]# vi /usr/local/webserver/nginx/sbin/cut_nginx_log.sh
#輸入以下內容 #!/bin/bash # This script run at 00:00
# The Nginx logs path logs_path=”/usr/local/webserver/nginx/logs/”
mkdir -p ${logs_path}$(date -d “yesterday” +”%Y”)/$(date -d “yesterday” +”%m”)/ mv ${logs_path}access.log ${logs_path}$(date -d “yesterday” +”%Y”)/$(date -d “yesterday” +”%m”)/access_$(date -d “yesterday” +”%Y%m%d”).log kill -USR1 |
2. 設定crontab 時間可以自設。
| [root@localhost ~]# crontab -e
#加入以下內容 00 00 * * * /bin/bash /usr/local/webserver/nginx/sbin/cut_nginx_log.sh |
十、自行檢測看所需要套件是否都有安裝完成
到nginx.conf所設定的目錄中,設定一個phpinfo。就可查詢是否有安裝成功。
設定方式如下
| [root@localhost ~]# cd /var/www/blog
[root@localhost ~]# vi index.php #加入以下內容 <?php phpinfo(); ?> |
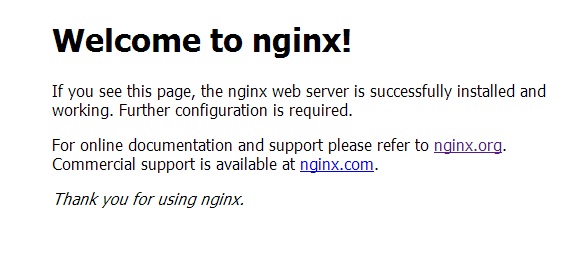
設定完成後可以開啟網頁輸入ip或是網址,可看到下圖。
參考資料:
http://blog.s135.com/nginx_php_v6/
http://blog.lrenwang.com/vps_lnmp_v1/
http://wiki.nginx.org/NginxChs


評論
此文章尚無評論。