前言 :
在使用Squid時,資安也是很重要的。在管理方面除了一些常用的設定,像限制使用IP、限制訪問網頁、限制連線時間和限制下載檔案類型等…還有就是登入時使用帳號密碼的驗證。一來可以防範不屬於設定內的人連線,也可增加安全性控管使用者。
設定與說明 :
Squid 帳號密碼驗證的方式有很多種,今天就來介紹幾種
1. Squid 預設本機驗證
2. LDAP Server 驗證
3. Windows AD Server 驗證
在開始設定以下驗證方式前,請先將SELinux關閉避免在操作上的問題
1. Squid 預設本機驗證
使用squid提供的ncsa_auth認證模組,此模組會使用apache提供的帳密建立指令 (htpasswd) 所製作的密碼檔作為驗證依據。
1.1 檢查是否有ncsa_auth和htpasswd
|
1 2 3 4 5 6 7 |
[root@localhost ~]# rpm -ql squid | grep ncsa /usr/lib64/squid/ncsa_auth /usr/share/man/man8/ncsa_auth.8.gz [root@localhost ~]# rpm -ql httpd | grep htpasswd /usr/bin/htpasswd /usr/share/man/man1/htpasswd.1.gz |
1.2 如果沒有htpasswd 請自行安裝
|
1 |
[root@localhost ~]# yum install httpd |
1.3 修改 squid.conf
1.3.1 開啟帳密認證功能
acl password proxy_auth REQUIRED 用搜尋的將前面註解拿掉
http_access allow password 新增此筆記錄,注意http_access順序,要新增在http_access deny all之前
|
1 2 3 4 5 6 7 |
[root@localhost ~]# vim /etc/squid/squid.conf #修改前 #acl password proxy_auth REQUIRED #修改後 acl password proxy_auth REQUIRED http_access allow password |
1.3.2 設定認證參數
auth_param basic program /usr/lib64/squid/ncsa_auth /usr/etc/passwd
利用ncsa_auth來驗證帳密「/usr/lib64/squid/ncsa_auth」為ncsa_auth存放位置。如果不知道的話可下rpm -ql squid | grep ncsa 查詢。
「/usr/etc/passwd」為使用htpasswd產生帳密所存放的路徑。若要使用系統內建的帳號密碼時可將此路徑改為「/etc/shadow」,但使用shadow為帳密,對於系統來說是不安全的,因此會不建議這樣設定。若一定要這樣設定的話請記得把SELinux關掉。
auth_param basic children 5
同時接受認證的連線數
auth_param basic realm Squid proxy-caching web server
使用者在輸入帳密的地方所顯示的說明文字
auth_param basic credentialsttl 2 hours
使用者連線時的連續時間
auth_param basic casesensitive off
使用特殊權限的帳號登入時會直接取消不給登入
|
1 2 3 4 5 6 7 8 9 10 11 12 13 14 |
[root@localhost ~]# vim /etc/squid/squid.conf #修改前 #auth_param basic program /usr/libexec/ncsa_auth /usr/etc/passwd #auth_param basic children 5 #auth_param basic realm Squid proxy-caching web server #auth_param basic credentialsttl 2 hours #auth_param basic casesensitive off #修改後 auth_param basic program /usr/lib64/squid/ncsa_auth /usr/etc/passwd auth_param basic children 5 auth_param basic realm welcome FAQ Squid test service auth_param basic credentialsttl 2 hours auth_param basic casesensitive off |
1.4 建立帳密
在使用htpasswd建立帳密時第一次要記得加參數-c,之後就不用加了。「derek」和「faq」為要新增的帳號。
|
1 2 3 4 5 6 7 8 9 |
[root@localhost ~]# htpasswd -c /usr/etc/passwd derek New password: Re-type new password: Adding password for user derek [root@localhost ~]# htpasswd /usr/etc/passwd faq New password: Re-type new password: Adding password for user faq |
1.5 重啟服務
設定完後記得要重啟服務才會生效喔
|
1 |
[root@localhost ~]# /etc/init.d/squid restart |
1.6 開啟瀏覽器測試
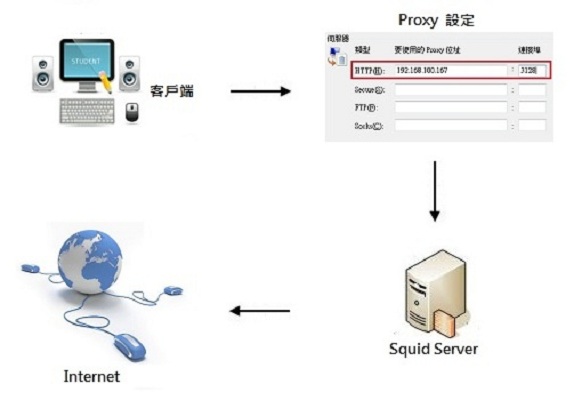
設定好Proxy後,瀏覽網頁就會看到下圖需要輸入帳號密碼的地方,在紅框的地方會看到剛剛需改的登入內容。
輸入帳號密碼後就能登入使用了
若是沒彈出要輸入帳號密碼又能使用,表示所在的IP為squid.conf內設定的允許IP範圍。
若彈出需要輸入帳密的話表示所在的IP不為允許的IP。因此需要輸入帳密做認證。
2. LDAP Server 驗證
如果已經建置好LDAP Server的話,大多數的帳密都由LDAP Server統一管理。因此可將Squid的認證交由LDAP Server。
2.1 Squid 的LDAP Server設定範例說明
使用「man squid_ldap_auth」找到EXAMPLES字串,就會有如何把LDAP Server銜接到Squid上的設定說明
使用中間為範例
「squid_ldap_auth -b “dc=your,dc=domain” -f “uid=%s” ldapserver」
將其修改成
「auth_param basic program /usr/lib64/squid/squid_ldap_auth -b “dc=faq-test,dc=tk” -h LDAPserver -f “uid=%s”」
/usr/lib64/squid/squid_ldap_auth 設定為squid_ldap_auth所在路徑,若為i386則將lib64改為lib。
-b “dc=faq-test,dc=tk” -b為使用baseDN來做連接,dc=faq-test,dc=tk則是依domain經由DNS轉換為DN來做設定。假設domain為faq-tesk.tk,就設定為dc=faq-test,dc=tk。此dc指「Domain Component」
-h LDAPserver -h為用來連接LDAPserver的參數。而在LDAPserver的部份請輸入該lLDAP Server的domain或是ip。
-f “uid=%s” 針對「uid」這個attribute的value做驗證
|
1 2 3 4 5 6 7 8 9 10 11 12 13 14 15 16 17 18 19 20 21 22 |
[root@localhost ~]# man squid_ldap_auth EXAMPLES For directories using the RFC2307 layout with a single domain, all you need to spec- ify is usually the base DN under where your users are located and the server name: squid_ldap_auth -b "ou=people,dc=your,dc=domain" ldapserver If you have sub-domains then you need to use a search filter approach to locate your user DNs as these can no longer be constructed direcly from the base DN and login name alone: squid_ldap_auth -b "dc=your,dc=domain" -f "uid=%s" ldapserver And similarily if you only want to allow access to users having a specific attribute squid_ldap_auth -b "dc=your,dc=domain" -f "(&(uid=%s)(specialat-tribute=value))" ldapserver Or if the user attribute of the user DN is "cn" instead of "uid" and you do not want to have to search for the users then you could use something like the following example for Active Directory: squid_ldap_auth -u cn -b "cn=Users,dc=your,dc=domain" ldapserver |
2.2 修改squid.conf
2.2.1 開啟帳密認證功能
acl password proxy_auth REQUIRED 用搜尋的將前面註解拿掉
http_access allow password 新增此筆記錄,注意http_access順序,要新增在http_access deny all之前
|
1 2 3 4 5 6 7 |
[root@localhost ~]# vim /etc/squid/squid.conf #修改前 #acl password proxy_auth REQUIRED #修改後 acl password proxy_auth REQUIRED http_access allow password |
2.2.2 設定連接LDAP
將設定參數加入到「#auth_param basic program /usr/libexec/ncsa_auth /usr/etc/passwd」下方即可。
|
1 2 3 |
[root@localhost ~]# vim /etc/squid/squid.conf #auth_param basic program /usr/libexec/ncsa_auth /usr/etc/passwd auth_param basic program /usr/lib64/squid/squid_ldap_auth -b "dc=faq-test,dc=tk" -h LDAPserver -f "uid=%s" |
2.3重啟服務
設定完後記得要重啟服務才會生效喔
|
1 |
[root@localhost ~]# /etc/init.d/squid restart |
2.4 開瀏覽器登入驗證
設定成功的話就會出現下面要輸入帳密的圖示。
此時也可查看Squid log 會出現相關LDAP的資料。
若是沒彈出要輸入帳號密碼又能使用,表示所在的IP為squid.conf內設定的允許IP範圍。
若彈出需要輸入帳密的話表示所在的IP不為允許的IP。因此需要輸入帳密做認證。
3. Windows AD Server 驗證
Windows AD Server的驗證方式也是用LDAP 為基礎來設定。
3.1 在AD上新增一個帳號給Squid使用,帳號:squid、密碼:123456
3.2 Squid 的AD Server設定範例說明
使用「man squid_ldap_auth」然後找到EXAMPLES字串開頭,然後在EXAMPLES說明的最後一段會有AD Server設定的說明
使用範例為
「squid_ldap_auth -P -R -b “dc=your,dc=domain” -D “cn=squid,cn=users,dc=your,dc=domain” -w “secretsquidpassword” -f “(&(userPrincipalName=%s)(objectClass=Person))” activedirectoryserver」
將其修改為
「auth_param basic program /usr/lib/squid/squid_ldap_auth -P -R -b “dc=faq-test,dc=tk” -D “cn=squid,cn=Users,dc=faq-test,dc=tk” -w “123456″ -f “(&(userPrincipalName=%s)(objectClass=Person))” -h 112.121.52.123」
-b “dc=faq-test,dc=tk” -b為使用baseDN來做連接,dc=faq-test,dc=tk則是依domain經由DNS轉換為DN來做設定。假設domain為faq-tesk.tk,就設定為dc=faq-test,dc=tk。此dc指「Domain Component」
-D “cn=squid,cn=Users,dc=faq-test,dc=tk” 使用DN為「cn=squid,cn=Users,dc=faq-test,dc=tk」使用squid此帳號登入
-w “123456″ 用DN為「cn=squid,cn=Users,dc=faq-test,dc=tk」使用squid此帳號登入的密碼為123456
-h 112.121.52.123 為AD Server的IP也可輸入domain
-f “(&(userPrincipalName=%s)(objectClass=Person))” userPrincipalName使用LDAP指令查出來的格式類型MAIL格式(derek@faq-test.tk)
[Note] cn(Common Name) squid 在windows上是「顯示名稱」而非帳號名稱,分類的圖示也要特別注意。有關OU、cn的說明可參考此篇「學習LDAP之前,最好你先看看什麼是LDAP」
|
1 2 3 4 5 6 7 8 9 10 11 12 13 |
[root@localhost ~]# man squid_ldap_auth EXAMPLES . 中間略過 . If you want to search for the user DN and your directory does not allow anonymous searches then you must also use the -D and -w flags to specify a user DN and pass- word to log in as to perform the searches, as in the following complex Active Direc- tory example squid_ldap_auth -P -R -b "dc=your,dc=domain" -D "cn=squid,cn=users,dc=your,dc=domain" -w "secretsquidpassword" -f "(&(userPrincipalName=%s)(objectClass=Person))" activedirectoryserver NOTES |
3.3 修改squid.conf
3.3.1 開啟帳密認證功能
acl password proxy_auth REQUIRED 用搜尋的將前面註解拿掉
http_access allow password 新增此筆記錄,注意http_access順序,要新增在http_access deny all之前
|
1 2 3 4 5 6 7 |
[root@localhost ~]# vim /etc/squid/squid.conf #修改前 #acl password proxy_auth REQUIRED #修改後 acl password proxy_auth REQUIRED http_access allow password |
3.3.2 設定連接AD Server
將設定參數加入到「#auth_param basic program /usr/libexec/ncsa_auth /usr/etc/passwd」下方即可。
|
1 2 3 |
[root@localhost ~]# vim /etc/squid/squid.conf #auth_param basic program /usr/libexec/ncsa_auth /usr/etc/passwd auth_param basic program /usr/lib/squid/squid_ldap_auth -P -R -b "dc=faq-test,dc=tk" -D "cn=squid,cn=Users,dc=faq-test,dc=tk" -w "123456" -f "(&(userPrincipalName=%s)(objectClass=Person))" -h 112.121.52.123 |
3.4 重啟服務
設定完後記得要重啟服務才會生效喔
|
1 |
[root@localhost ~]# /etc/init.d/squid restart |
3.5 開瀏覽器登入驗證
設定成功的話就會出現下面要輸入帳密的圖示。
此時也可查看Squid log 會出現相關AD Server使用的資料。
若是沒彈出要輸入帳號密碼又能使用,表示所在的IP為squid.conf內設定的允許IP範圍。
若彈出需要輸入帳密的話表示所在的IP不為允許的IP。因此需要輸入帳密做認證。







評論
此文章尚無評論。