主機環境:
Linux Centos5.6 64位元
安裝套件:
mod_dav_svn
subversion
yum安裝
|
[root@localhost ~]# yum install mod_dav_svn subversion |
使用yum安裝時,如果安裝apache的話,會自動把所需要的都一併安裝。如: apr、apr-util、apache等….
若要查看subversion是否有安裝或安裝成功可下此命令查詢
|
[root@localhost ~]# svn –version svn, version 1.6.11 (r934486) compiled Apr 14 2011, 07:41:38 Copyright (C) 2000-2009 CollabNet. 以下省略……… |
開啟Apache服務
先查看apache是否有安裝好。如果有要修改到設定請小心
首先開啟/etc/httpd/conf/httpd.conf
|
[root@localhost ~]# vim /etc/httpd/conf/httpd.conf #如果有要修改請改這隻檔 [root@localhost ~]# service httpd start #開啟apache Starting httpd: [ OK ] [root@localhost ~]# chkconfig httpd on #設定開機自動開啟 |
查看是否與下圖一樣。若沒看到表示apache有問題,在重新啟動看看。

Subversion給Apache基本設定
在來設定apache內的相關設定好讓Subversion能與apache相互抓取需要的資料
|
[root@localhost ~]# vim /etc/httpd/conf.d/subversion.conf #在最上方查詢是否有這兩行,沒有的話請自行加入 LoadModule dav_svn_module modules/mod_dav_svn.so LoadModule authz_svn_module modules/mod_authz_svn.so #在subversion.conf加入下列的內容,此內容是用來支援基本驗證, 並將Apache指到實際放置版本庫 <Location /repos> # /svn 代表網址 http 連線進入的根目錄路徑位置 DAV svn # svn = 連線方式 SVNPath /var/www/svn/repos # svn 本機檔案位置 AuthType Basic AuthName "Subversion repos" # 顯示登入帳號密碼的顯示資訊 AuthUserFile /etc/svn-auth-conf # 帳秘存放的位置 Require valid-user # 需輸入帳號密碼 #Satisfy Any # 無需帳號即可使用 </Location> |
建立帳號密碼
第一次設定時要加參數 –CM。它會建立檔案並用 MD5 將密碼加密,之後就只要使用M這個參數就行了。
(yourusername,anotherusername請設帳號)
|
[root@localhost ~]# htpasswd -cm /etc/svn-auth-conf yourusername #第一次建帳密 New password: #輸入密碼 Re-type new password: #確定輸入的密碼 Adding password for user yourusername [root@localhost ~]# htpasswd -m /etc/svn-auth-conf anotherusername #第二次建帳密 New password: #輸入密碼 Re-type new password: #確定輸入的密碼 Adding password for user anotherusername |
設定版本庫
再來建立用來提交及取區檔案的版本庫。
svnadmin create為建立一個新的空版本庫,說明可參考【svnadmin create】
|
[root@localhost ~]# cd /var/www/ [root@localhost ~]# mkdir svn [root@localhost ~]# cd svn [root@localhost ~]# svnadmin create repos [root@localhost ~]# chown -R apache.apache repos [root@localhost ~]# service httpd restart |
測試看看透過網頁是否能存取到版本庫,
http:// yourmahcine/repos (yourmacine請輸入自己IP或是網址)
一開始應該會看到一個要輸入使用者名稱和密碼的視窗,請輸入剛剛上面所設定的帳密

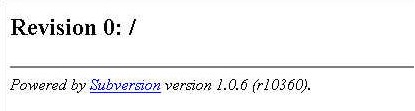
登入後會看到瀏覽器出現,Revision 0: /的頁面如下圖,若有看到這兩個畫面表示初部設定沒問題。
再來介紹如何運用Subversion
順利的話,現在所要做的就是建立版本庫。可用下列方式查看svn有什麼使用方式
|
[root@localhost ~]# svn --help |
最常使用的是 : svn import、svn commit ( ci )、svn checkout ( co )
會用 import 將檔案匯入版本庫; checkout 取出它們作修改;commit 將改動提交到資料庫內。
說明一下目錄結構,在根目錄下設有 branches、tags 及 trunk 目錄,當中 trunk 會包含所有檔案,如下
此部份不以寫程式或維護「項目」。主要用來儲存相對簡單的設定檔及文件。請用適合你的方式來設置
建立目錄及放置檔案
在建立目錄和檔案時的結構可依自行需求設定
|
[root@localhost ~]# cd /tmp [root@localhost ~]# mkdir mytestproj #建立mytestproj資料夾 [root@localhost ~]# cd mytestproj [root@localhost ~]# mkdir configurations options main [root@localhost ~]# vim configurations/testconf1.cfg #內容可自行輸入 [root@localhost ~]# vim options/testopts1.cfg [root@localhost ~]# vim main/mainfile1.cfg |
匯入
把剛剛所建立好的資料匯入到 subversion
|
[root@localhost ~]# svn import /tmp/mytestproj/ file:///var/www/svn/repos/mytestproj -m "Initial repository layout for mytestproj" Adding /tmp/mytestproj/main Adding /tmp/mytestproj/main/mainfile1.cfg Adding /tmp/mytestproj/configurations Adding /tmp/mytestproj/configurations/testconf1.cfg Adding /tmp/mytestproj/options Adding /tmp/mytestproj/options/testopts1.cfg Committed revision 1. |
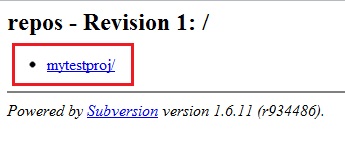
登入網頁測試http:// yourmahcine/repos (yourmachine請輸入自己IP或是網址)
會看到下圖,且可以點選mytestproj查詢內容
取出
此時可以看到匯入的資料,除了文字檔外,都可點選下載。
這邊來測試用另一台Linux主機上使用它。此操作為另一台Linux主機
|
[root@localhost ~]# cd /tmp [root@localhost ~]# svn co http:// yourmahcine /repos/mytestproj #(yourmacine請輸入自己IP或是網址) A mytestproj/main A mytestproj/main/mainfile1.cfg A mytestproj/configurations A mytestproj/configurations/testconf1.cfg A mytestproj/options A mytestproj/options/testopts1.cfg Checked out revision 1. |
編輯及提交
此時已經從Subversion伺服器取出第一版。現在來試試編輯一些東西後在提交回Subversion伺服器,
此操作為另一台Linux主機
|
[root@localhost ~]# cd mytestproj/ [root@localhost ~]# vim configurations/testconf1.cfg #自行加入或刪除一些內容 [root@localhost ~]# svn commit -m "Added a line to testconf1.cfg." Sending configurations/testconf1.cfg Transmitting file data . Committed revision 2. |
新增或刪除物件
在新增上使用Add這個參數,刪除使用delete這個參數,設定完後會發現在版本上會變為第3版,
此操作為另一台Linux主機。
不管在做任何的操作之前都一定要先更新一次,再做動作。
|
[root@localhost ~]# svn co http:// yourmahcine /repos/mytestproj #(yourmacine請輸入自己IP或是網址) A mytestproj/main A mytestproj/main/mainfile1.cfg A mytestproj/configurations A mytestproj/configurations/testconf1.cfg A mytestproj/options A mytestproj/options/testopts1.cfg Checked out revision 2. [root@localhost ~]# cd mytestproj [root@localhost ~]# cp /etc/yum.repos.d/CentOS-Base.repo configurations/ [root@localhost ~]# svn add configurations/CentOS-Base.repo #新增檔案 A configurations/CentOS-Base.repo [root@localhost ~]# svn commit -m "Added the CentOS Yum repo file." Adding configurations/CentOS-Base.repo Transmitting file data . Committed revision 3. |
還原
如果在臨時上有問題要還原到之前的版本的話,可以先查看log,這邊會存放每次所提交的訊息。在針對log部份做還原。
Log 查詢版本
|
[root@localhost ~]# svn log http://yoursvnserver/repos #(yourmacine請輸入自己IP或是網址),此為針對整個版本庫查詢 [root@localhost ~]# svn log http://yoursvnserver/repos/mytestproj #(yourmacine請輸入自己IP或是網址),此為針對個別項目查詢 |
還原版本
|
[root@localhost ~]# svn co -r 1 http://yoursvnserver/repos/mytestproj #(yourmacine請輸入自己IP或是網址),數字1為要還原的版本 |
存取控制清單
簡單的說這個部份就是權限的設定,可以給使用者寫入或讀取的設定。
此設定都是透過 AuthzSVNAccessFile這個檔案選項來完成的,以一個檔名來作為參數。
|
[root@localhost ~]# vim /etc/httpd/conf.d/subversion.conf <Location /repos> DAV svn SVNParentPath /var/www/svn/repos AuthzSVNAccessFile /etc/svn-acl-conf #加入此段,路徑部份可自己修改 AuthType Basic AuthName "Subversion repos" AuthUserFile /etc/svn-auth-conf Require valid-user </Location> |
再來就可以依自行設定的路徑建立檔案,這邊是建立於 /etc/svn-acl-config
當中存取權可以是 r(唯讀)、rw(讀寫)、或空白(禁止存取)。預設的 ACL 是禁止用戶存取版本。
|
[root@localhost ~]# vim /etc/svn-acl-config [framework:/] john = r joe = rw |
也可以在名叫 groups 的分段內建立群組,然後在存取控制清單內將 @ 符號放在群組前面
|
[groups] staff = joe, george [framework:/] john = r @staff = rw |
如果想令所有用戶能閱讀每個版本庫,你可以為每個版本庫的根目錄加入以下一個分段
|
[/] * = r |
想了解如何在Client端設定請參考此篇【Subversion Client端(windows設定)】
更多內容
 Subversion Client端(windows設定)
 Centos FTP (vsftp)虛擬化設定
 Mysql phpMyAdmin 安全性設定
- LVM-LV的容量增減設定
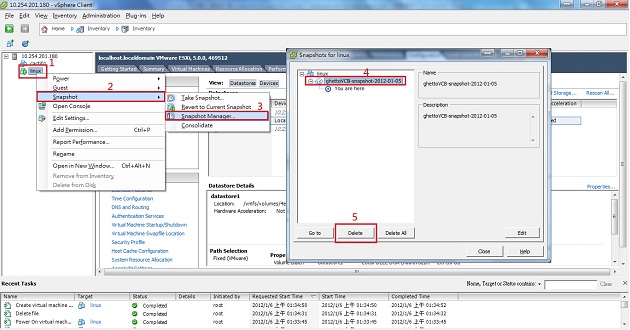 ghettoVCB備份 錯誤訊息 Snapshot found for「host」, backup will not take place
 - 【軟體分享】 Your Unin-staller
- Windows Server 2003 Active Directory(AD) 七. 群組
- Cacti中文化、額外軟體、常見問題
- RSS 錯誤訊息 Extra content at the end of the document
 ProxySwitcher與Firefox相關應用


評論
此文章尚無評論。