一、 SSL介紹
安全套接層(Secure Sockets Layer,SSL)是網景公司(Netscape)在推出Web瀏覽器首版的同時,提出
的協議。SSL採用公開密鑰技術,保證兩個應用間通信的保密性和可靠性,使客戶與伺服器應用之間的通信
不被攻擊者竊聽。可在伺服器和客戶機兩端同時實現支持,目前已成為網際網路上保密通訊的工業標準,
現行Web瀏覽器亦普遍將Http和SSL相結合,從而實現安全通信。此協議和其繼任者傳輸層安全(Transport
Layer Security,TLS)是為網路通信提供安全及數據完整性的一種安全協議。TLS與SSL在傳輸層對網路連
接進行加密。
二、 SSL設定說明
安裝SSL時,openssl 一定要安裝最新版本,stable版本。(請依當時的最新版本安裝)
SSL 官網 查最新的SSL http://www.openssl.org/source/
完成以上軟體的安裝後, 我們便可開始進行憑證申請及安裝, 其程序大致如下:
1) 產製金鑰對
2) 產生憑證申請檔
3) 購買SSL憑證(或自行產生)
4) 安裝憑證
1. 安裝OPENSSL
|
[root@localhost ~]# wget http://www.openssl.org/source/openssl-0.9.8q.tar.gz [root@localhost ~]# tar zxvf openssl-0.9.8q.tar.gz [root@localhost ~]# cd openssl-0.9.8q [root@localhost ~]# ./config [root@localhost ~]# make [root@localhost ~]# make install |
2. 設定OpenSSL 設定檔的位置
2.1 先把要用的資料夾建立好
|
[root@localhost ~]# mysql -u root -p cacti < pa.sql [root@localhost ~]# mkdir /etc/ssl [root@localhost ~]# cp /etc/pki/tls/openssl.cnf /etc/ssl/. [root@localhost ~]# cd /etc/ssl [root@localhost ~]# mkdir private [root@localhost ~]# mkdir certs [root@localhost ~]# mkdir crl [root@localhost ~]# mkdir newcerts [root@localhost ~]# touch index.txt [root@localhost ~]# export OPENSSL_CONF="/etc/ssl/openssl.cnf" |
2.2 修改openssl.cnf設定
|
[root@localhost ~]# vi /etc/ssl/openssl.cnf #把這行 dir = ../../CA # Where everything is kept #改為 dir = /etc/ssl # Where everything is kept #把這行 countryName_default = GB #改為 countryName_default = TW |
2.3 把 OpenSSL 設定檔的位置加進 .bashrc 中
|
[root@localhost ~]# echo "export OPENSSL_CONF=\"/etc/ssl/openssl.cnf\"" >> ~/.bashrc |
2.4 產生亂數的檔案
|
[root@localhost ~]# openssl rand 1024 > /etc/ssl/private/.rand [root@localhost ~]# chmod og-rwx /etc/ssl/private/.rand |
以上準備好後,可以開始製作Root CA
3. 製作Root CA
退出 shell 重新登入root
我們要做的Root CA 為winners.ca ,如果之前有做過的話,現在再做一次,之前簽的憑證都會失效。
3.1 建立憑證密碼
|
[root@localhost ~]# openssl genrsa -des3 -out /etc/ssl/private/faq.ca.key 1024 #此時必須為最高層認證中心的 Private Key 設定一個適當的密碼,以後在用這把Private Key簽發#其它憑證時,都需要用到這個密碼。 #參數說明: genrsa 表示使用 RSA 演算法產製金鑰\r -des3 表示使用 DES3 加密演算法 -out mykeys.key 表示輸出的檔案為何, 檔名及路徑可自定 1024 表示金鑰對長度為 1024 (建議使用) % 您可以另外使用 openssl genrsa ? 看其全部的參數\r Enter PEM pass phrase: (請在此輸入金鑰對密碼) [root@localhost ~]# chmod og-rwx /etc/ssl/private/faq.ca.key |
3.2 接著填寫憑證申請
跟誰申請?因為是Root CA ,沒有上級了,所以就是跟自己申請。
|
[root@localhost ~]# openssl req -new -key /etc/ssl/private/faq.ca.key -out /tmp/faq.ca.req #參數說明: req 表示要產生 CSR 檔 -new 新的檔案 -key mykeys.key 金鑰對檔案的路徑及檔名 -out mysite.key 所產生的 CSR 檔案的路徑及檔名 接著, 會出現 Enter PEM pass phrase: (請輸入先前設定好的密碼) |
3.3 填入資料
|
Country Name (2 letter code) [TW]:TW #請用兩個英文字元表示 State or Province Name (full name) [Taiwan]:Taiwan #省份名稱 Locality Name (eg, city) [Newbury]:Taipei #城市名稱 Organization Name (eg, company) [My Company Ltd]:FAQ-BOOK #(公司名稱) Organizational Unit Name (eg, section) []:CA #部門名稱 Common Name (eg, your name or your server's hostname) []:blog.faq-book.com #網址名稱, 即公用名稱, 您要使用 SSL 加密的站台名稱 Email Address []:derek@faq-book.com #網站管理者的email address |
此外, 尚有一些 extra 的資料, 您可不理會, 直接按 Enter 過去即可, 最後即可產生 faq.ca.crt 檔
3.4 自己給自己簽名
|
[root@localhost ~]# openssl x509 -req -days 7305 -sha1 \-extfile /etc/ssl/openssl.cnf -extensions v3_ca \-signkey /etc/ssl/private/faq.ca.key \-in /tmp/faq.ca.req -out /etc/ssl/certs/faq.ca.crt |
3.5 刪除憑證申請書
|
[root@localhost ~]# rm -f /tmp/faq.ca.req |
3.6保護 faq.ca.key
|
[root@localhost ~]# chmod 0400 /etc/ssl/private/faq.ca.key |
Root CA搞定後,即可使用這個Root CA 簽發其它的憑證。
如果沒有要購買SSL憑證的話看第4點(假頁面)
是要購買SSL憑證的話請看第5點
4. 製作伺服器憑證
4.1 接著來製作blog.faq-book.com 的SSL憑證
|
[root@localhost ~]# openssl genrsa -out /etc/ssl/private/blog.faq-book.com.key 1024 [root@localhost ~]# chmod og-rwx /etc/ssl/private/blog.faq-book.com.key |
4.2 填寫憑證申請書,向nuface Root CA 做申請
|
[root@localhost ~]# openssl req -new -key /etc/ssl/private/blog.faq-book.com.key -out /tmp/ blog.faq-book.com .req |
4.3填入資料
|
Country Name (2 letter code) [TW]:TW #請用兩個英文字元表示 State or Province Name (full name) [Taiwan]:Taiwan #省份名稱 Locality Name (eg, city) [Newbury]:Taipei #城市名稱 Organization Name (eg, company) [My Company Ltd]: FAQ-BOOK #公司名稱 Organizational Unit Name (eg, section) []:CA #部門名稱 Common Name (eg, your name or your server's hostname) []:blog.faq-book.com #網址名稱, 即公用名稱, 您要使用 SSL 加密的站台名稱 Email Address []:derek@faq-book.com #網站管理者的email address |
此外, 尚有一些 extra 的資料, 您可不理會, 直接按 Enter 過去即可, 最後即可產生 blog.faq-book.com.crt 檔
4.4用最高層認證中心(Root CA)簽發憑證
|
[root@localhost ~]# openssl x509 -req -days 3650 -sha1 \-extfile /etc/ssl/openssl.cnf -extensions v3_req \-CA /etc/ssl/certs/faq.ca.crt -CAkey /etc/ssl/private/faq.ca.key \-CAserial /etc/ssl/faq.ca.srl -CAcreateserial \-in /tmp/bolg.faq-book.com.req -out /etc/ssl/certs/bolg.faq-book.com.crt |
4.5刪除憑證申請書
|
[root@localhost ~]# rm -f /tmp/blog.faq-book.com.req |
4.6保護 blog.faq-book.key
|
[root@localhost ~]# chmod 0400 /etc/ssl/private/blog.faq-book.key |
5. 將第三步所產生的CRT
5.1存放在/etc/ssl/certs中的faq.ca.crt
提供給SSL廠商 購買SSL憑證
5.2在憑證核發後, 您會收到一封 Email, 其中包含憑證檔案(此信會寄到當初申請此faq-book.com的信箱,忘了可用whois查)
5.3請將其剪下, 另存成一個文字檔, 檔名自定, 如 blog.faq-book.com.crt, 並放置於剛剛所建立為了管理方便起見的 certs 資料夾中(當然, 您可以依據自己的需要, 放置於您決定的路徑即可)
5.4最後, 您只須修改 Apache 的設定檔 ssl.conf
|
[root@localhost ~]# vi /etc/httpd/conf.d/ssl.conf Listen 443 #預設值 443 <VirtualHost _default_:443> # General setup for the virtual host DocumentRoot "/var/www/html" ServerName http://www.ooo.xxx:443 ServerAdmin mymail@mail.com.tw ErrorLog /usr/local/apache/logs/error_log TransferLog /usr/local/apache/logs/access_log #設定方式與httpd.conf雷同 # SSL Engine Switch: # Enable/Disable SSL for this virtual host. SSLEngine on #預設值 on #SSLCertificateFile /etc/pki/tls/certs/localhost.crt SSLCertificateFile /etc/ssl/certs/winners.ca.crt #即憑證路徑, 請指向放置憑證檔的路徑 #SSLCertificateKeyFile /etc/pki/tls/private/localhost.key SSLCertificateKeyFile /etc/ssl/private/winners.ca.key #即私鑰路徑, 請指向放置私鑰檔的路徑 #SSLCertificateChainFile /etc/pki/tls/certs/server-chain.crt SSLCertificateChainFile /etc/ssl/certs/winners.com.tw.crt #若您申請購買SSL伺服器數位憑證, 您務必要設定為購買的SSL憑證 |
5.5 之後, 您便可重新啟動 apache 了
|
[root@localhost ~]# apachectl startssl #在啟動過程中, 會要求您輸入密碼如下: Enter pass phrase: #請在此輸入您當初產製金鑰對時的密碼 |
6. 番外篇 將 http 與 https 的網頁分開
剛剛我們處理的是 Apache 的 SSL ,也就是說原本的 WWW 資料可以分別使用 http 及 https 來瀏覽。
那可不可以將這兩個傳輸協定分開呢?
舉例來說,主網頁 (http) 在 /var/www/html 底下,
但 https 則僅能在 /var/www/www 目錄中。是可以的,同樣透過虛擬主機來處理即可!很簡單喔!
|
[root@localhost ~]# vi /etc/httpd/conf.d/ssl.conf # 找到底下這兩行,並且將他改掉! DocumentRoot "/var/www/www" ServerName *:443 #意思是說,任何主機名稱都是到上述的目錄去! [root@localhost ~]# apachectl restart |
如此一來 https 與 http 是看到不同的地方囉
更多內容
 SSL憑證 安裝 移除教學 For Windows Server 2003
- [問題紀錄]發生找不到 mysql.sock 的處理方法
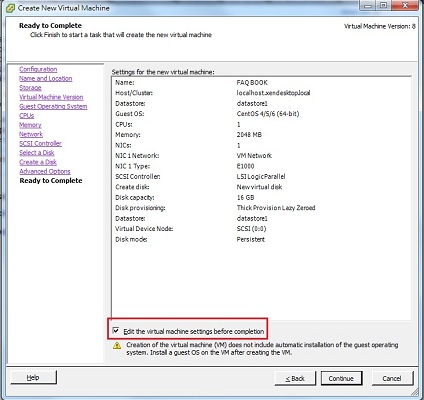 VMware vSphere 5.1 新增VM虛擬機
- Nginx 安裝時常見的問題 2
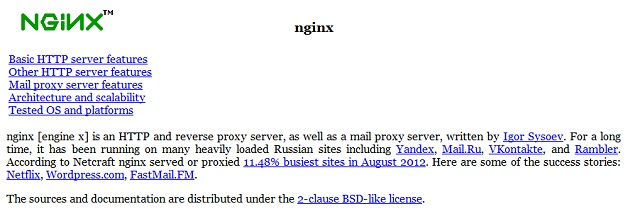 Nginx – Virtual Host 設定
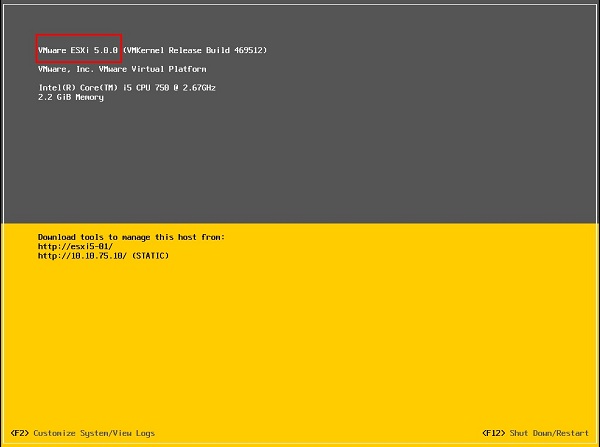 VMware ESXi5.0輕鬆升級ESXi5.1
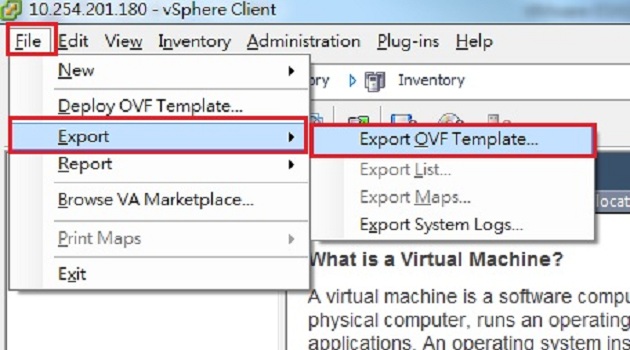 VMware ESX(i)使用VMware vSphere Client做OVF備份與還原
 監控軟體 Veeam ONE Free Edition – Reporter 儀表板管理
 VMware vSphere Client 5.0下載安裝
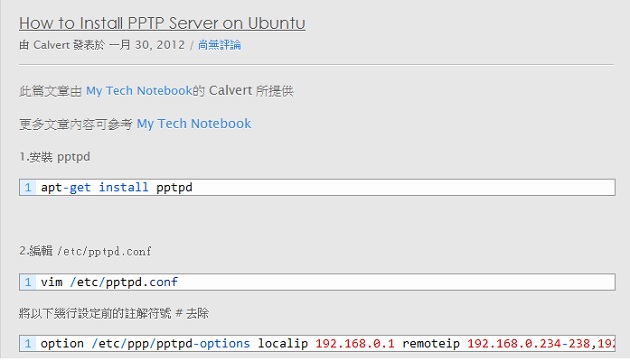 How to Install PPTP Server on Ubuntu


It’s understandable that money can make people independent. But what to do when somebody does not have money? The only one way is to receive the mortgage loans and college loan.
Nice site, nice and easy on the eyes and great content too.